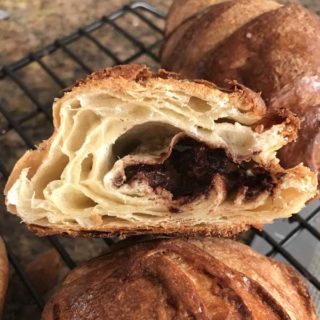
Fuzz is in France on a language immersion, and since we miss her already I've made some Small Batch Pain au Chocolat -- her favorite! Hopefully she'll be able to find something as good in Paris. Ha ha. But seriously, these are pretty darn good.
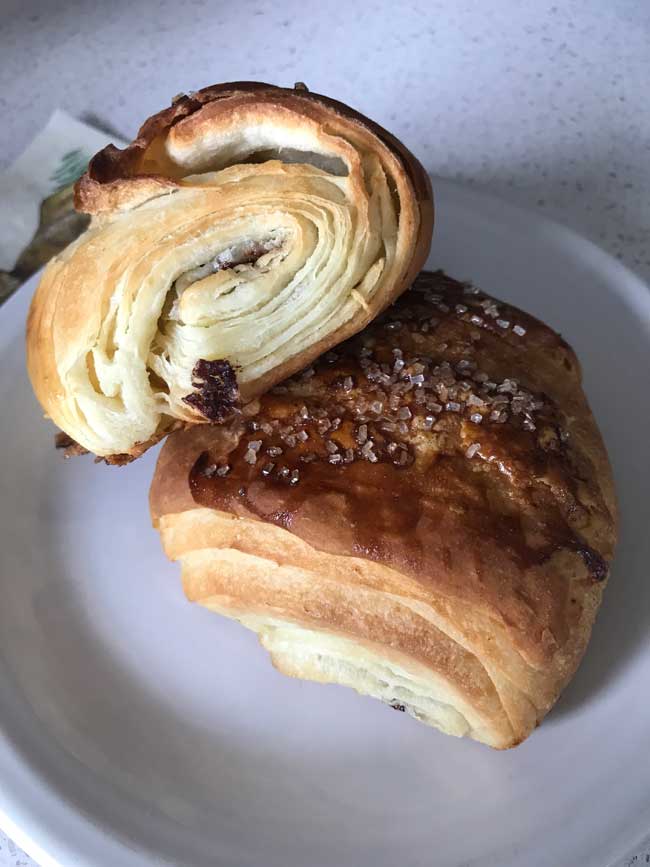
Small Batch Pain au Chocolate
I've been using this recipe for small batch pain au chocolat recipe for about 2 years now and just never had the guts to post it because I'm no pastry chef and as you can see from my photos, not that good at making things neat and symmetrical. Still, by some miracle these always come out amazingly delicious.
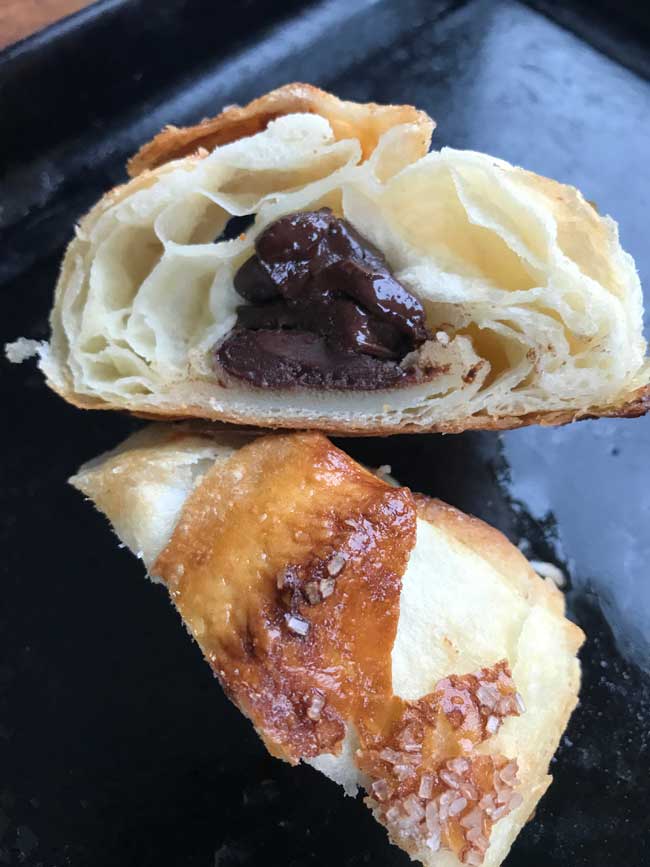
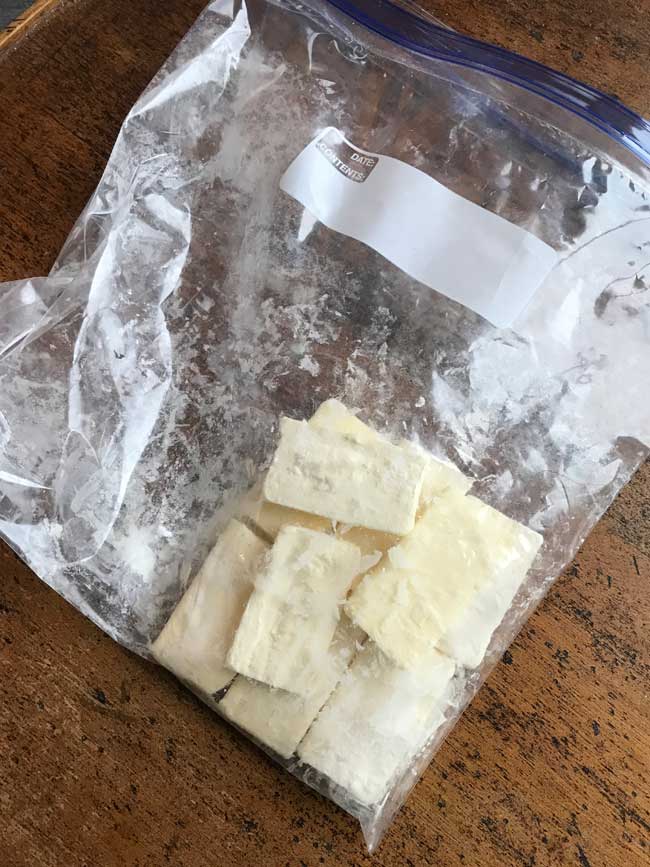
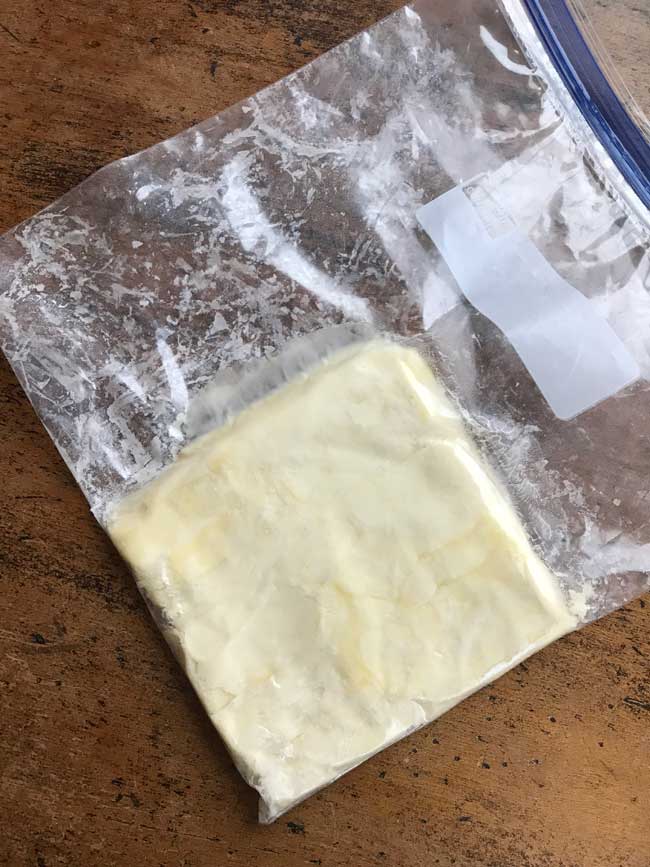
The recipe gives you about 9 pastries, so if you need more than that you can click over to King Arthur's recipe. My version is similar, but I halved the recipe, cut the salt a bit, reduced the baking temperature to curb butter leakage and changed the rolling dimensions so they'd work with the reduced amount of ingredients. I also make my butter block in a zipper bag which cuts the mess.
Butter Block in a Bag
Pain au Chocolat Turns and Folds
As you may know, croissants and pain au chocolat are made with a laminated dough. The square of butter is placed on the dough, which is then folded over it and sealed, rolled into rectangle and folded and rolled again several times to make layers. Each set of rolling and folding is called a "turn", and each turn gives you more layers. This recipe doesn't have a lot of turns, but still has a decent amount of buttery, flaky layers. The key is making sure the butter is the right temperature so that it spreads in the dough as you roll and doesn't break or get absorbed by the dough. It's pretty simple once you get the hang of it, but takes practice.
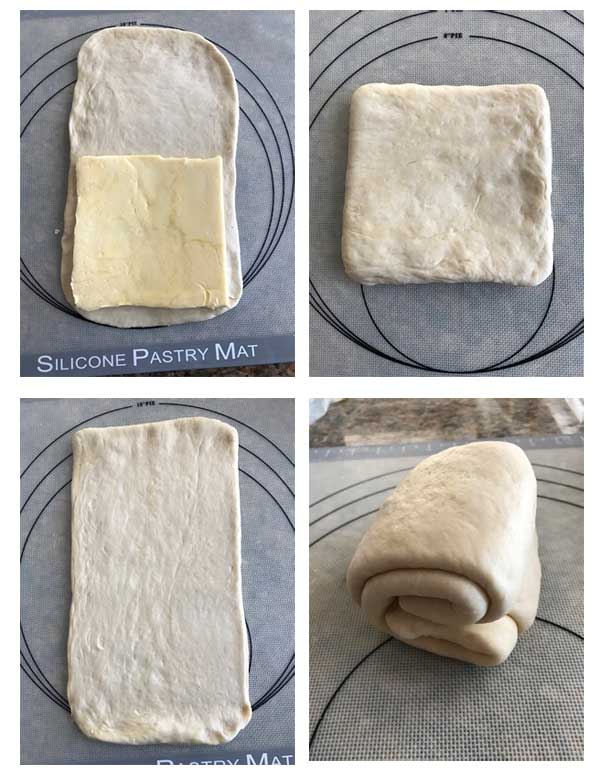
My biggest challenge is and probably will always probably be rolling neat rectangles. Oh well. Doesn't matter here! It does for croissants, but pain au chocolat is easier since you are not making beautiful crescents but rather square bundles of chocolate.
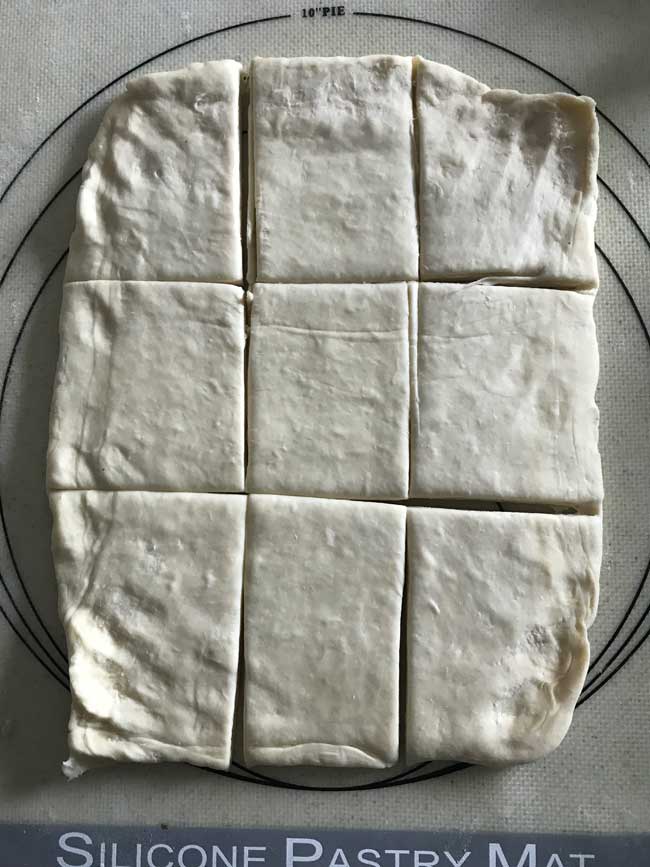
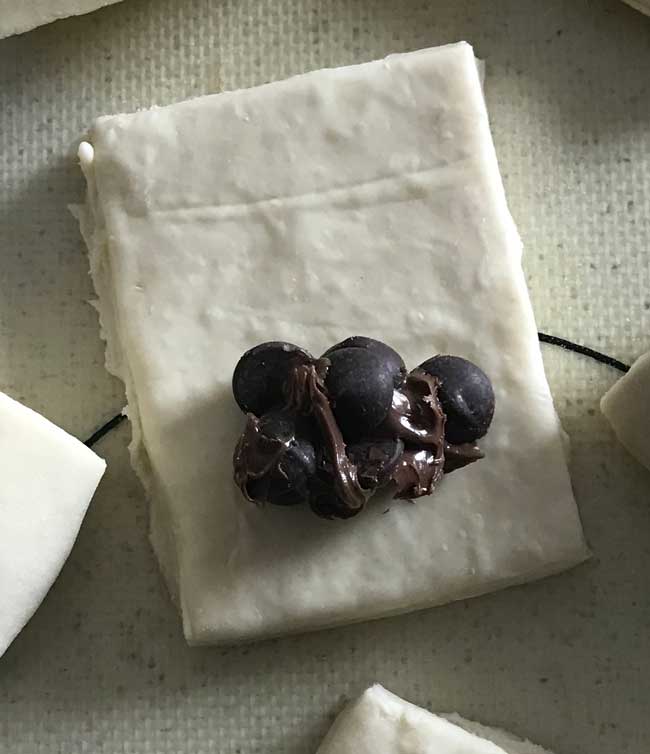
Speaking of chocolate, in France they use chocolate batons, but you can use any kind of chocolate you like. I use a combo of Ghirardelli chips and Nutella or just chunks of good quality chocolate.
The downside of this recipe is that while it's fairly easy and fun, it requires some patience as you have to let the dough sit overnight, then for another 2 hours after laminating butter, and a final hour for the last rise. But trust me -- they are worth the wait!
Some Hints and Tips
I hope you enjoy this small batch pain au chocolat recipe as much as we do. Whether you use this version or any other recipe, here are a few tips.
- You can use any brand of unsalted butter, but you may get less leakage with Kerrygold or European style butter. Also, Kerrygold tends to roll easier than some brands of American butter. That is, when you roll the dough the butter rolls right along with it without breaking or melting into the dough.
- If the dough puffs up too much during the last rise, pinch the seams together and seal with a little beaten egg. If liquid from the butter leaks out onto the pan, no worries -- the pastries should still be fine. Just remove them from the pool of butter. USE A RIMMED PAN.
- All-purpose flour works best. You can use bread flour for firmer pastries, but the dough may be spring-y and difficult to work with.
- These freeze extraordinarily well, so if even the small batch is too many for you, just let them cool, wrap and freeze.
- For best results, use a scale for measuring the flour. If you are new to making laminated dough or pastry in general, I also recommend a pastry mat.
Recipe
Small Batch Pain Au Chocolat
Ingredients
- 270 grams all-purpose flour this could be 2 to 2 ¼ cups
- 2 tablespoon sugar 28 grams
- 1 ¼ teaspoon instant yeast Platinum
- ½ teaspoon plus a pinch salt
- ¼ cup plus 2 tablespoons warm water 84 grams
- ¼ cup plus 2 tablespoons milk 84 grams
- 2 tablespoons unsalted butter softened
- a teaspoon or so of olive oil for bowl or melted butter
Butter Block
- 1 ½ sticks 170 grams unsalted butter**
- 1 tablespoon flour
- 9 rectangular pieces of good quality chocolate or see notes
- 1 lightly beaten egg for brushing
- Sparkling sugar for topping optional
Instructions
- Combine the 270 grams of flour, sugar, instant yeast and salt in the bowl of a stand mixer.
- Combine the water and milk in a microwave safe measuring cup. Heat mixture in microwave until it is very warm (about 127 degrees).
- Add milk/water mixture and softened butter to the flour mixture and stir until a dough forms.
- Attach dough hook to mixer and knead until smooth and elastic. The dough should be thick and neither too sticky nor dry. Transfer to a bowl that you’ve rubbed with olive oil (or melted butter).
- Cover and let rise at room temperature for one hour, then punch down. Transfer dough to a gallon size zipper bag and chill overnight.
- Prepare the butter block. Cut the stick of butter lengthwise into 3 even strips then cut those strips in half to make 6 pieces. Repeat with the half stick of butter so that you have 9 pieces. Put butter pieces in a 1 gallon freezer zipper bag and add 1 tablespoon flour. Shake well to coat. Set the bag on a flat surface and nudge the butter pieces down toward the corner of the bag, keeping them flat. Using your rolling pin and your fingers, gently pound and mold into a 5 inch square, using the corner of the bag as guide. Your square should end up in the corner of the bag. Chill the square of butter until it is firm.
- About 10 minutes prior to rolling, take your butter square out of the refrigerator and cut away the zipper bag (save the greasy bag, you can use it for rolling and covering the rising dough).
- Using flour only as necessary, on a silicone mat, roll the cold dough into a rectangle that is at least 6 inches wide and about 13 inches long. Set the butter square at the bottom of the rectangle leaving about a half inch between edge of dough and the butter square. Fold the top of the rectangle down over the butter and seal the edges to make a big square.
- Flip the dough over and make sure the butter is completely sealed in. Dust with a little flour, then using your hands, push the square of dough inward so it becomes somewhat rectangular (if it’s not already). Use your rolling pin to roll it into a rectangle that is about 8 inches wide and close to 16 inches long.
- Take the top (8 inch side) and fold downward toward the middle, then take the bottom and fold up toward the middle leaving a ½ inch space in the middle. Now fold at the ½ inch space like a book (the half inch space becomes the spine).
- Position the dough so that the “spine” is on the left, then roll into another rectangle again that’s about 5 inches wide and at least14 inches long. Repeat the folding process you just did for the “book” by folding the top and bottom in toward the middle, then folding again at the space where they almost come together. This time you'll have a rather stubby "book".
- Wrap tightly and chill for 2 to 4 hours.
- At this point the dough will be a pretty firm puffed up block. Using your rolling pin, pound it down and on a lightly floured pastry mat, roll into a big rectangle about 9x12. The dough may be slightly spring-y so you’ll probably need to let it rest a bit between rolls. The goal is to get a 9x12 inch rectangle, but if you can’t get your rectangle that large don’t worry.
- Cut whatever size rectangle you've made into 9 pieces. If you were able to roll into a 9x12 inch rectangle, you should have 9 pieces that are 3x4 inches each. If not, you can pound and roll each section separately into a 3x4 inch piece as you roll the chocolate.
- Put your chocolate near the bottom edge of the rectangle, then roll up tightly.
- Set seam side down on a parchment lined baking sheet, and press down slightly to give them kind of a squarish shape. Repeat with all the squares so they are all on one large RIMMED baking sheet. The butter may leak, so you really need a rimmed baking sheet.
- Cover the unbaked pain au chocolate with a piece of greased wax paper or plastic wrap (or the greasy bag you used for the butter) and let sit at room temperature for about an hour. They will puff up a bit.
- Brush with a little beaten egg, giving extra egg-attention to the seams. If they’ve puffed up, you’ll want to carefully pinch them and seal them with egg. Sprinkle with sugar if desired.
- Preheat the oven to 450 (you will bake at 400, but start with a really hot oven).
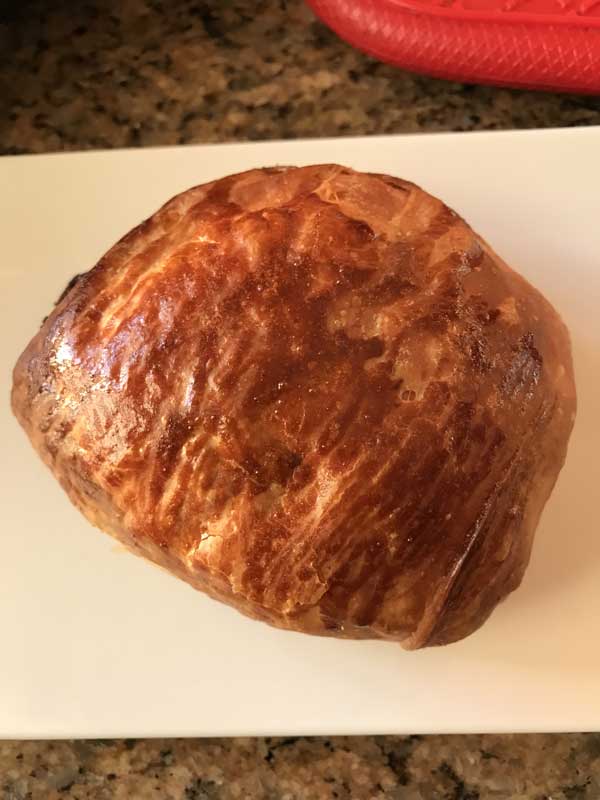
- Put the pastries in the hot oven, close the door and immediately turn down heat to 400. Bake for 18 minutes or until golden brown. If you pull the pastries out of the oven and they are sitting in pools of butter, don’t worry. Just pick them up and transfer them to a cooling rack.
- You can serve them anytime now or let them cool and freeze. I like to get stuff extra chocolate into the sides while they are still hot.
Notes
You can use any kind of chocolate you want. I especially like using a Ghirardelli bitttersweet chocolate chips mixed with a little Nutella.

Sue says
These look really good! They remind me of when our daughter came home from Denmark and longed for the chocolate croissant she had there. They were fun to make but a labor of love and patience.
Beverly says
Anna, These look wonderful!
Even when I worked as a pastry chef, I did not have the patience you show in making these.
SHHH _ Here's my secret. The Chocolate Croissants as well as the Almond Croissants from Trader Joe's are wonderful . You just set them out to rise overnight and bake them off in the morning. I always make them when my grandchildren stay overnight.