
This is a great recipe for Rainbow Cookies. I originally called it No-Almond Rainbow Cookies because you make the cakes with ground macadamia nuts instead of almond paste. These days almond flour is a staple in many homes, so unless you truly don't like or are allergic to almonds, you can make these with almond flour instead of the ground macadamias. They still have all-purpose flour too, so they're not gluten-free.
9-inch Pans
I originally used 3 9-inch square pans for these. That's still an option, but if you have a Dollar Tree nearby, you can buy three 7x11 inch pans (also called brownie pans) and use those. The cakes will bake up a bit thicker since the surface area is smaller. If that's a problem, just trim.
Rainbow Cookies Food Coloring
My old notes apply in terms of texture and tallness, but with the almond flour they do have the flavor missing from the old And definitely use deeper food color.
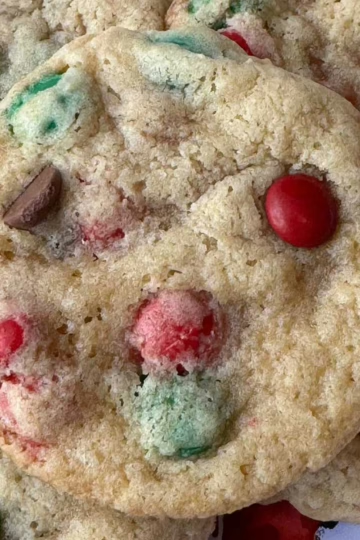
Old notes: These rainbows were taller and lighter in texture, but I really messed up by using pastel colored food gel rather than thick gel paste. These seem a little less flavorful than the others. However, I think the paler colors are influencing my perception and personally, I do miss the almond. My fifth graders in the house, however, preferred these rainbow cookies over the almond type. So if you don't like almond flavorings or are making these for kids, these are a good bet. Just make sure to use a good, vivid food coloring paste.

Updated Notes
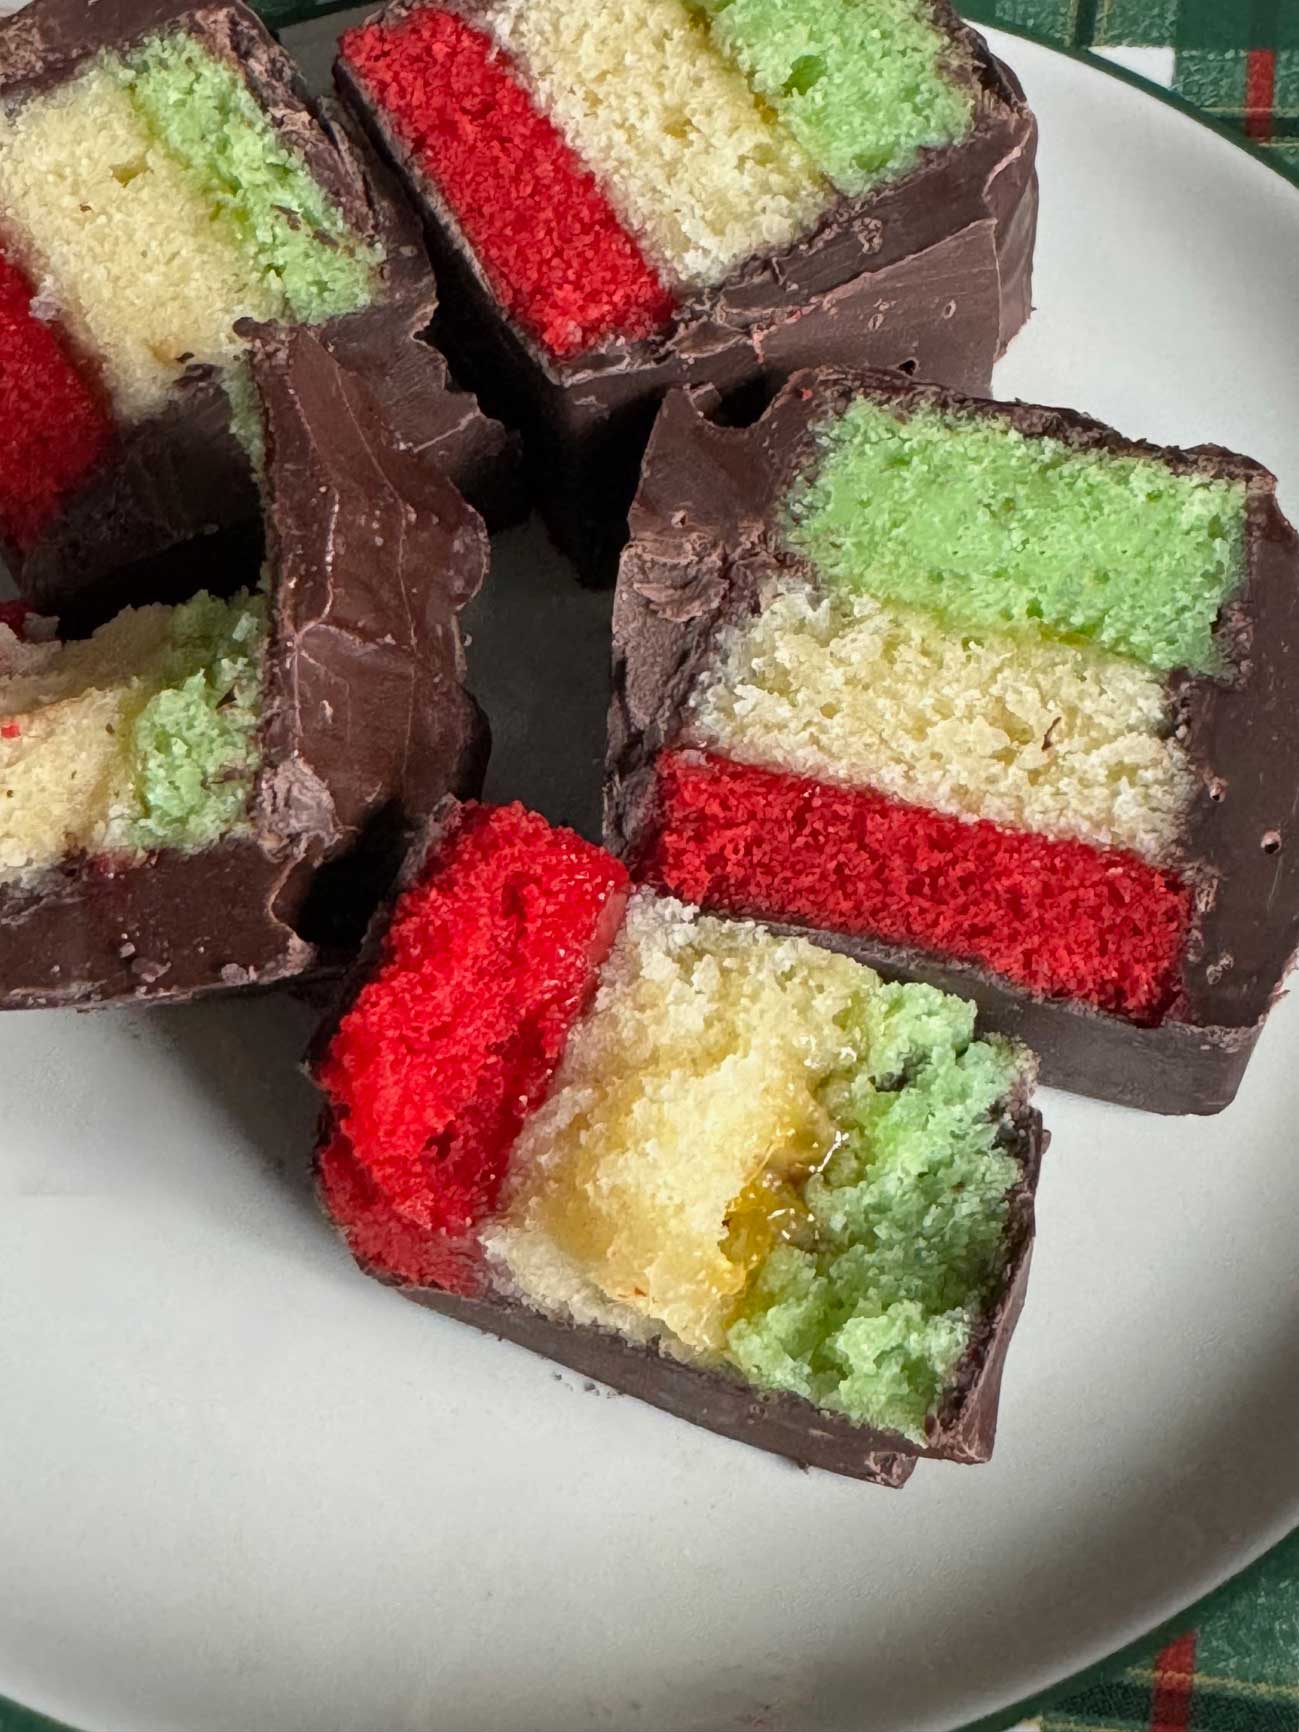
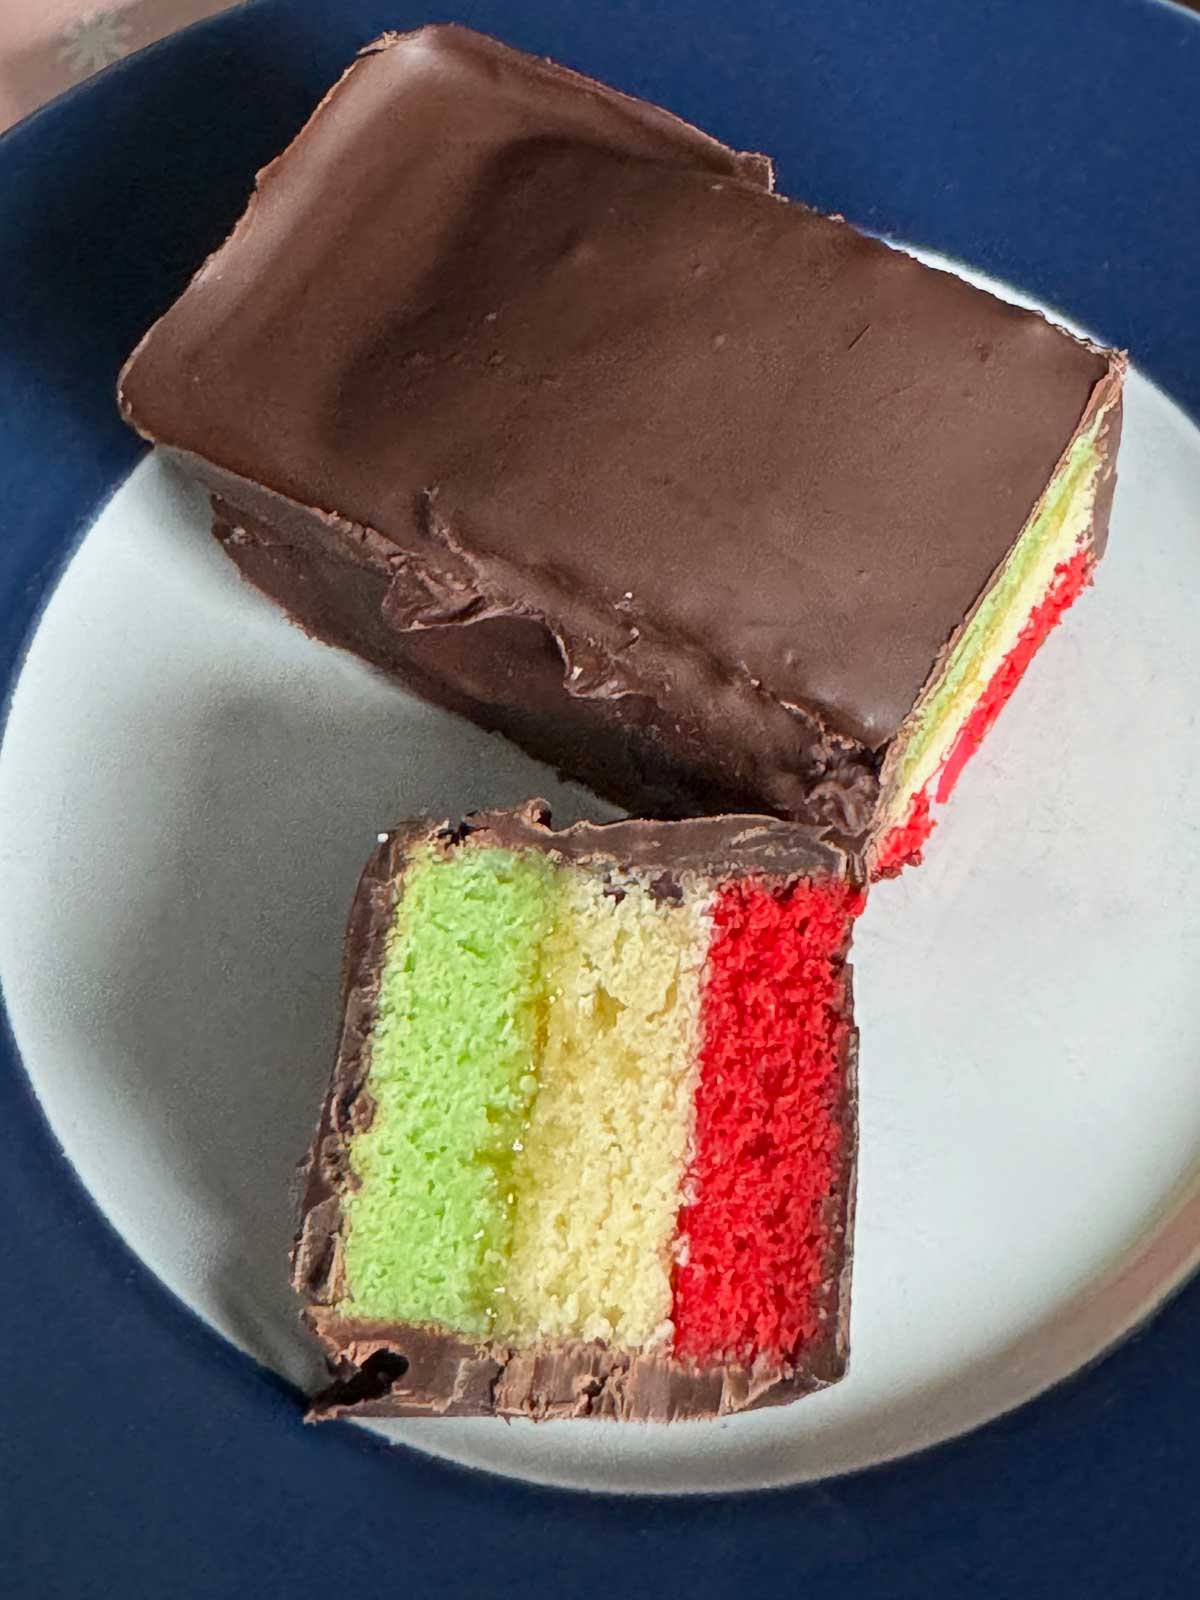
So the new version is not that different. Just use almond flour in place of the macadamia nuts. For the chocolate, melt chocolate of your choice in a double boiler and use your favorite method of dipping. I am hopeless when it comes to dipping chocolate and silicone molds are my best friend. I cut the stacked cakes just small enough to fit snugly in the molds, pour chocolate over, let set, then slice. I bought molds at Hobby Lobby, but Amazon has quite a few as well. They need to be about 2 to 2 ½ inches deep to hold the cake.
Recipe
No Almond Rainbow Cookies
Ingredients
- ⅔ cup macadamia nuts or a heaping half cup (65 grams) of almond flour ready to eat, unsalted
- ⅔ cup confectioners' sugar (80 grams)
- 1 large egg white
- 4 large eggs
- 1 cup granulated sugar (200 grams)
- 8 oz butter, melted and cooled (228 grams)
- 1 ½ teaspoons vanilla extract
- 1 cup all-purpose flour (127 grams)
- ½ tsp. salt
- 6-8 drops red food coloring, Super Red works well paste
- 6-8 drops green food coloring paste
- ¼ cup seedless raspberry preserves
- ¼ cup apricot preserves
Chocolate Coating
- 12-18 oz chocolate or chocolate chips
- 1 tablespoon shortening (optional)
Instructions
- Preheat oven to 375F and line three 9 inch square metal pans with non-stick foil. If you only have one or two pans, just use what you have and bake each layer separately. The batter can stand for a few minutes.
- Place the nuts in a food processor; cover and process until ground. Add the confectioners' sugar and egg white; cover and process until blended.
- In a large bowl, beat eggs and sugar on high speed for 2-3 minutes or until thick and lemon-colored. Gradually beat in ground nut mixture, then melted butter, vanilla and salt. Add the flour and stir by hand until it is mixed in.
- Divide batter into thirds - if you have a scale, each portion should weigh 11 oz. Stir red food coloring into one portion of batter; stir green food coloring into another portion. Leave remaining batter plain (or add a little yellow).
- Bake for 12 minutes or until a toothpick inserted near the center comes out clean and edges begin to brown. Cool for 10 minutes before removing from pans to wire racks to cool completely.
- Place red layer on a large sheet of cling wrap and spread with raspberry preserves. Top with plain layer, then spread plain layer with apricot preserves. Add green layer; press down gently. Wrap the cooled stack of cakes in cling wrap and put in the freezer for a few hours or until frozen. You can keep the cakes frozen for up to a month if you wrap them tightly.
Chocolate Coating
- When ready to dip, trim the left and right sides of the square with a chef's knife. Leave the top and bottom sides raggedy. Cut the square in half horizontally, then cut each half into 6 rectangles so that you have 12 rectangles about equal size with raggedy ends. For wider bars, cut 10 rectangles. If using the silicone loaf pan for coating, cut the bars so that they fit in the loaf pan with just a bit of room for you to pour chocolate over and down the sides.
- Put all your frozen cake rectangles back in the pan and store them in the freezer while you prepare the dipping chocolate.
- Have ready a parchment covered baking sheet and a little extra room in the refrigerator or a silicone mini loaf pan.
- Melt chocolate in the top of a double boiler. You can use the microwave if that's easier for you, but a bowl set over simmering water keeps the chocolate mixture warm and smooth. Adding shortening is optional and depends on what kind of chocolate you are using. If using fine chocolate you don't need it. If using chocolate chips, a bit of shortening will help keep the texture soft when set.
Method One
- Remove the frozen cake sticks from the freezer and holding by a raggedy end, dip as far as you can into the chocolate, letting it fall back into the bowl. Set the dipped stick on the parchment. Do this until all your chocolate is gone, then repeat melting procedure by melting butter, adding more chocolate etc. Continue until all your sticks are dipped. Chill until set.
- Before serving, pull the sticks from the refrigerator. Trim the raggedy ends and cut each stick into about 3 nice cubes.
Method Two -- Silicone Mini Loaf Pan Molds
- Spoon chocolate into a silicone mini loaf pan and brush it up the sides and all over the walls.
- Stick a frozen cake rectangle in it allowing the chocolate to come up and over it somewhat. Spoon more chocolate over. Chill until set.
Eric in AZ says
You are absolutely correct that they get better after a day or two..they become moist and the chocolate coating keeps it all from drying out..I store them in the fridge in bars and cut them 30 mins before needed and let them come to room temperature. Also I always trim the "raggedy" edges and dip the entire bar in chocolate,,,,you'll need some kind of dipping tool ( fork or tongs) and let them cool on wax paper...I have never tried parchment but I sure that works well too. Now the raggedy edges are delicious with coffee as you are dipping the bars. They will be gone before you are done dipping especially if anyone else passes through the kitchen. Keep up the great work...I'll be trying a new rainbow recipe from a cookbook I just got called Inside the Jewish Bakery in the next few weeks...looks like it could be a winner. I'll let you know.
sue @ Cakeballs, cookies and more says
These sound great.
Anna says
One thing I've noticed about all the rainbow cookies, especially the ones from this recipe, is that they taste better on Day 2 after the preserves and chocolate have "settled in". I think from now on I'll do the freezing, coating and slicing step a day ahead, then let the covered, cut, cake squares sit in a tightly covered container at room temperature for a day. In a lot of cases, this is what people would naturally do anyway, so it all works out for the best!
Sue says
I like the idea of the macadamia nut version but since I love almonds this version isn't as appealing to me. I don't mind the more muted colors but they do look more festive with the deeper colors.
Anna says
Mimi and Adam, I definitely want to try this again with actual almonds and almond extract. I'll try to do it this week, in fact. I also want to try making a real Americanized version with chocolate, vanilla and strawberry or maybe a super simple one using three types of cake mix. Mimi, thanks for the typo catch!
Adam says
Well you realize that your next step is to use almonds with this method and see what the result are. Technically the type of nut you use shouldn't matter, so I'd be curious to see if it does, and surprised if it did :). But again, all of your testing is simply awesome and really appreciated for when I finally get to making one of these. And I actually kind of like the more muted colours in these versions. It makes it look more like food :).
Mimi Wan says
I love the muted colors but love almonds. Can you just sub almonds back into the recipe? Also, I think you meant to type "trim" versus "trip" the ends at the end of the recipe. I had to read it a few times to figure out what you meant!