Loaf Pan Homemade Kit Kat Bars are not really like Kit Kats at all. I'm putting that out there to set expectations. The only thing Homemade Kit Kat Bars have in common with their namesake is layers, and that each layer is filled with a bumpy caramel type mixture. And then there's the peanut butter. Last time I checked Kit Kats didn't have peanut butter. All that being said, these rank in my top ten favorite treats of all time. They are part cookie, part candy with flavors of peanut butter, graham & Ritz crackers and buttery caramel. Plus they have a goofy name, which always makes cookies better.
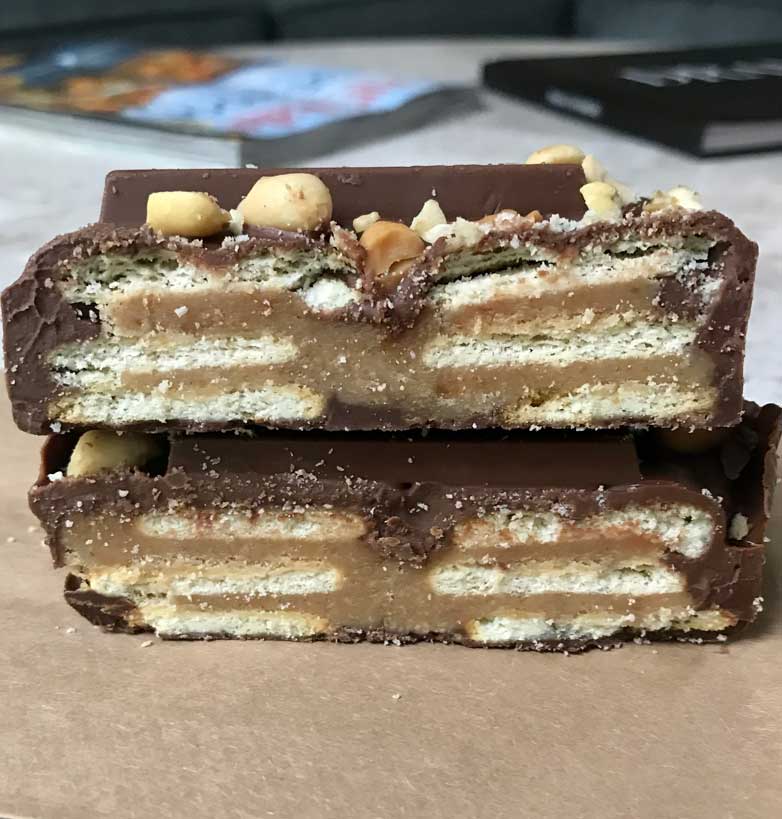
Loaf Pan Homemade Kit Kat Bars
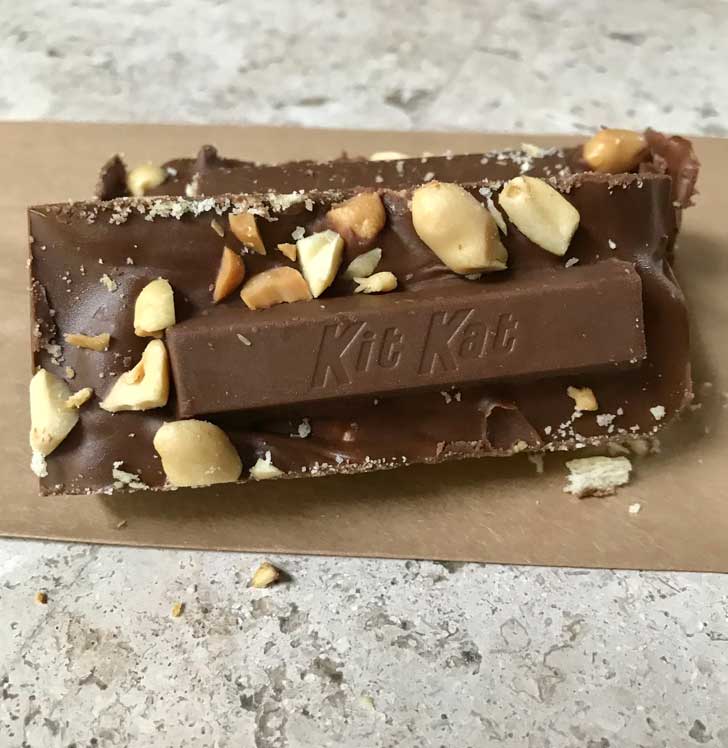
In the past I've made these as Club Cracker Bars, which is probably a better name than Kit Kat Bars since, as mentioned, these aren't really Kit Kats. But this week I've been making the bars in a loaf pan and using Ritz, so I decided to just revert back to the original inaccurate name (though I did stick an actual Kit Kat on top). Maybe I should call them Ritz Bars?
Microwave to the Rescue
At any rate, I was making scaled down versions of the original version with Club Cracker and having issues with the smaller size batch. Or at least with the filling. The caramel kept separating, and it was difficult to determine when it was done. Then it occurred to me that for a small batch loaf pan version I should use same method as for Quick Matzo Crunch and just microwave the filling. It worked perfectly!
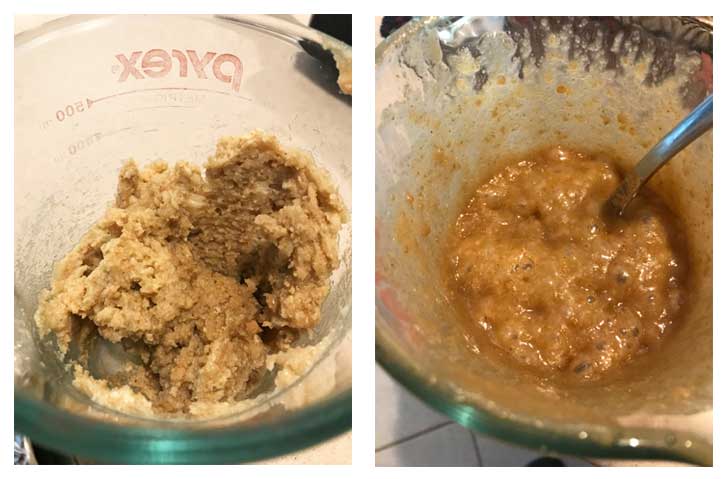
It took a bit of trial and error to get the timing exactly right, but once I figured out the correct heating times making Homemade Kit Kat Bars became about 1000 times easier. Plus the small batch loaf pan size made more sense since I've been baking for two. Never mind the fact I've made it 5 times to test it and could now feed the whole neighborhood. Thank goodness these freeze well.
Loaf Pan Bars
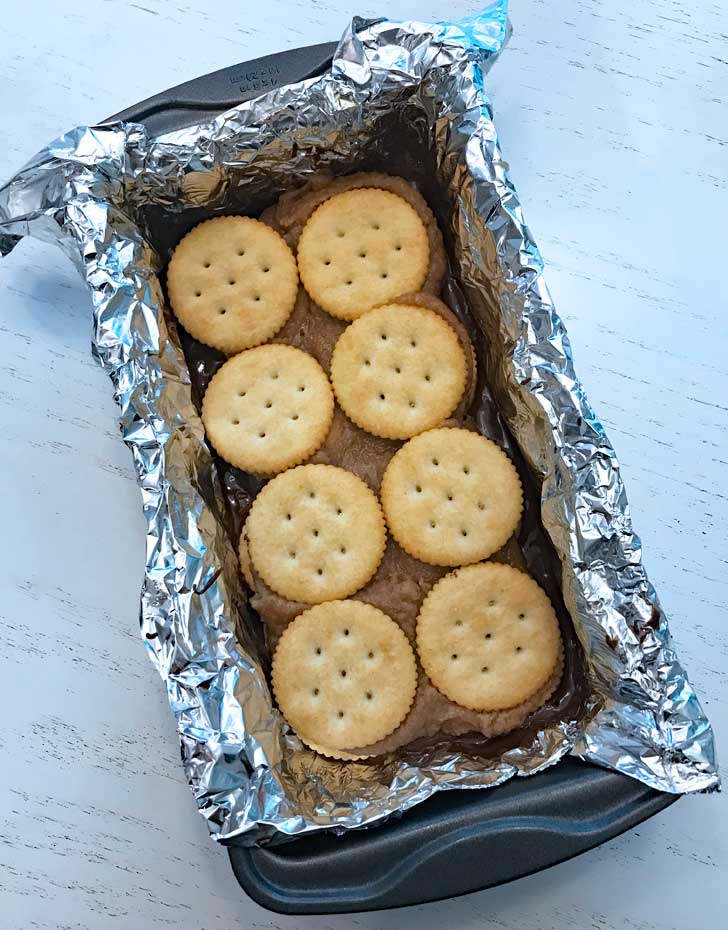
Here's a picture of the bars in the loaf pan without the top layer of chocolate. The shape of the pan makes them easy to cut into long thin slices, but they are rich so you'll probably end up cutting them into squares or even slivers.
Kit Kat Bars Equipment Notes
This recipe is easy but requires some very basic equipment. Here's the rundown.
- Microwave. We have a 1200 watt 1.2 Panasonic Inverter which is a pretty powerful microwave for the money. If you are using a microwave with a lower wattage, your cook times may be a little longer.
- Small bowl for melting chocolate in the microwave.
- A 2 cup Pyrex liquid measuring cup for boiling the filling. The Pyrex cups are handy for just about everything. For some reason all of mine are 2 cup measures, so I need to put in an order for the assorted set I linked to. I could do a lot with that 32 oz one! But the 2 cup one is what you need for this recipe. If you don't have one you can use a bowl, but be sure the sides are high enough so that the caramel filling does not boil over. Things get wild when you are microwaving milk.
- A loaf pan with a bottom that measures 4 to 5 inches across, so depending on the shape a 9x5 should be fine. Most of my 9x5 inch pans have measure 4 inches across the bottom.
- Foil -- Foil is more expensive now so I usually buy the cheapest brand or whatever is on sale. I used to love the non-stick foil, but that's a luxury item now.
Ingredient Notes
- Feel free to substitute Club Crackers. I've been using actual Ritz and Aldi's "Buttery Rounds" which are surprisingly good and cost less than $2.
- For the chocolate chips I've been testing with Hershey's because they have been on sale. You can use any brand or you can use milk chocolate. The only issue with milk chocolate is sometimes it will get too soft at room temperature, whereas the chips are a bit firmer. On the other hand, chocolate coating made with melted chips can get too hard, but in this case that's not a problem because the peanut butter is mixed in. If you try the bars and like them, you can experiment with different type of chocolate coating. I'm in the midst of testing a white chocolate version.
- Butter -- I've been testing with store-brand salted butter and haven't had any problems with the caramel mixture separating in the microwave.
- Sugar -- The recipe calls for both granulated and light brown. You could also try dark.
- Toppings -- I put a Kit Kat on top just for fun. Usually I just use peanuts.
Variations
Since I had to test the filling so many times, I came up with a couple of variations including No-Peanut Butter Kit Kat Bars and a White Chocolate Kit Kat Bars recipe. The white chocolate version does have peanut butter.
Recipe
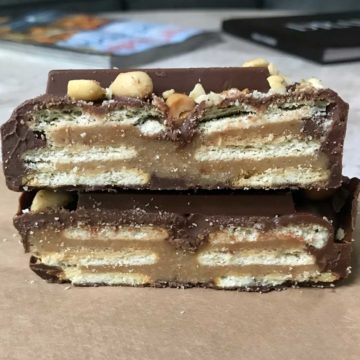
Loaf Pan Homemade Kit Kat Bars
Ingredients
- ½ cup any chocolate chips or 3 oz of chopped chocolate (84 grams)
- 24 regular Ritz Crackers
- 4 tablespoons salted butter (56 grams)
- ½ cup graham cracker crumbs (45 grams)
- ¼ cup light brown sugar (50 grams)
- ¼ cup granulated sugar (50 grams)
- 2 ½ tablespoons whole milk -- don't forget it! (35 grams)
- ½ cup milk chocolate chips (84 grams)
- 2 tablespoons creamy peanut butter (32 grams)
- Chopped peanuts for garnish optional
Instructions
- Line a loaf pan (one that has a 4 inch bottom) with foil. No need to grease foil.
- In a microwave-safe bowl or a 2 cup glass measure, melt the ½ cup chips (or chocolate) using 50% power and stirring every 30 seconds. When melted, spread across bottom of the lined pan.
- Anchor 8 Ritz crackers in the melted chocolate, making an even layer. Push the cookies toward each other so that you'll have a border of chocolate on each side.
- In a 2 cup microwave-safe measure (like a Pyrex), soften the butter using a low heat and mashing just until soft. Do not melt. Add the milk, sugars and graham crackers and stir until everything is evenly blended.
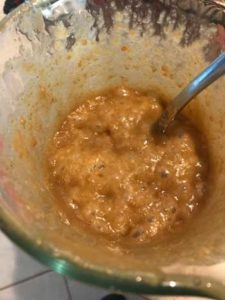
- Microwave mixture for 1 minute on high. Stir well. Microwave for 30 seconds, keeping a close eye on it so that it doesn't boil over. Stir again. Microwave for another 15 seconds, stopping to stir, and then two or three more rounds of 15 seconds each, stirring. The mixture should look something like this. If you want to check it with a candy thermometer, it should be between 235 and 240.
- Pour half of the sugar mixture down the center of the layer of crackers, then press on 8 more crackers, letting the sugar mixture kind of splay out evenly as you press the crackers. Pour on the rest of the sugar mixture, then add the final layer of 8 crackers.
- In the same microwave-safe bowl or cup you used to melt first layer of chocolate, combine the chocolate chips and peanut butter. Heat on 50% power, stirring at 30 or 50 second intervals until smooth and creamy.
- Pour the chocolate mixture over the bars, spreading evenly. Sprinkle peanuts on top if desired.
- Let cool at room temperature for a few minutes, then transfer to the refrigerator and chill until the top is set or put in the freezer if you are in a hurry. I'm always in a hurry and always use the freezer.
- When you are ready to cut, remove from the refrigerator or freezer, peel away the foil and slice the bars. If you have used the freezer, the chocolate will be very hard and you will need to let the bars sit at room temperature for 15- 20 minutes so that you can put the knife through without shattering frozen chocolate.

Anna says
Sue, if you ever dig up the old recipe let me know! Hope you get a chance to try the microwave version.
Sue says
I used to make a different version of these all the time. My son loved them and they were great for taking places….. back when we used to go places and share baked things……..
Thanks for putting together a smaller microwave version.