
Last week I bought a bag of frozen bread dough so I could make Food & Wine's Breton Butter Cake. The dough worked very well for the buttery pastry. Since it worked for that, I figured it would also work as a shortcut to Pain au Chocolat. It did!

Rhodes Frozen Bread Dough
So if you are interested in making Pain au Chocolat but don't want to deal with making the dough, here's a convenient recipe for Pain au Chocolate made with Rhodes frozen bread dough.
Rhodes Brand Bread Dough
I'm mentioning Rhodes brand because it's the only brand I can find around here. Plus it's what I've been testing with. Rhodes comes in a 3 pound bag with 3 individually frozen loaves of dough. For this recipe, you'll only need 1 of the frozen loaves. You'll also need a large work surface and a pastry mat. You can get by without one, but having a pastry mat makes dough projects so much more fun.
Laminating Frozen Bread Dough
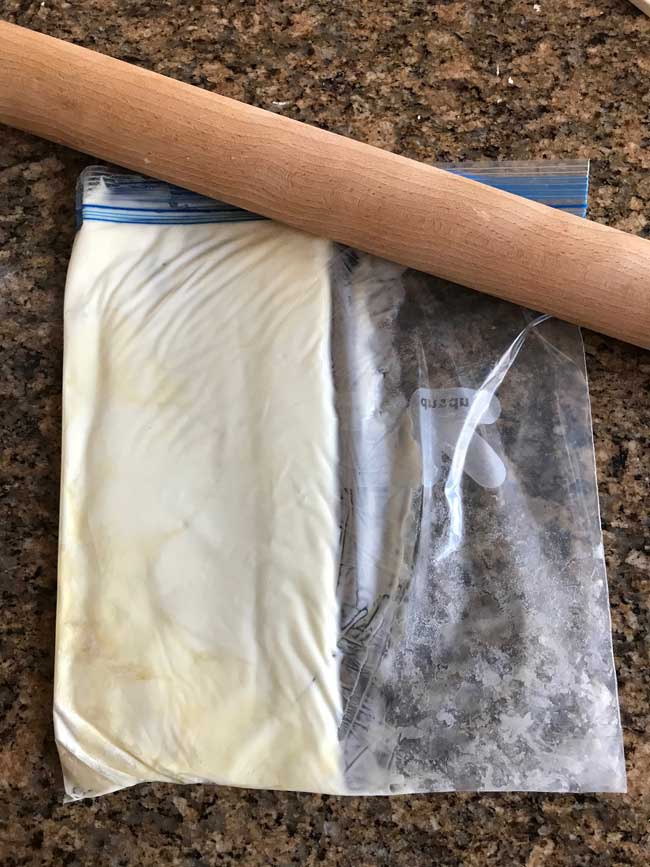
You'll be turning the frozen bread dough into a laminated dough, which means you'll need to first make a "butter block". This is the big sheet of butter which gets rolled between layer of dough. My favorite way to make a butter block is in a gallon size freezer bag. The plastic bag curbs the mess. Plus, when you cut the butter out of the bag you get a big greasy piece of plastic. You can use the greased plastic to put between the dough and the rolling pin, transfer the dough, and cover the rising pastry. The greasy bag gets a lot of mileage here!
Next, you roll the bread dough into a rectangle and place half the butter in the center.
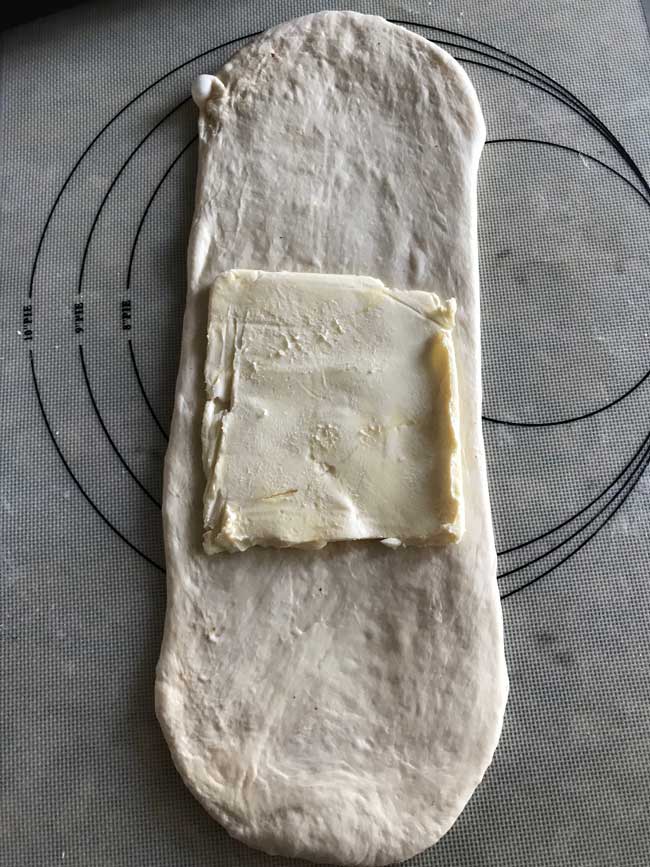
Then the top is folded over, the second half of the butter is stacked on, and the bottom part of the dough is cut and stacked on top.
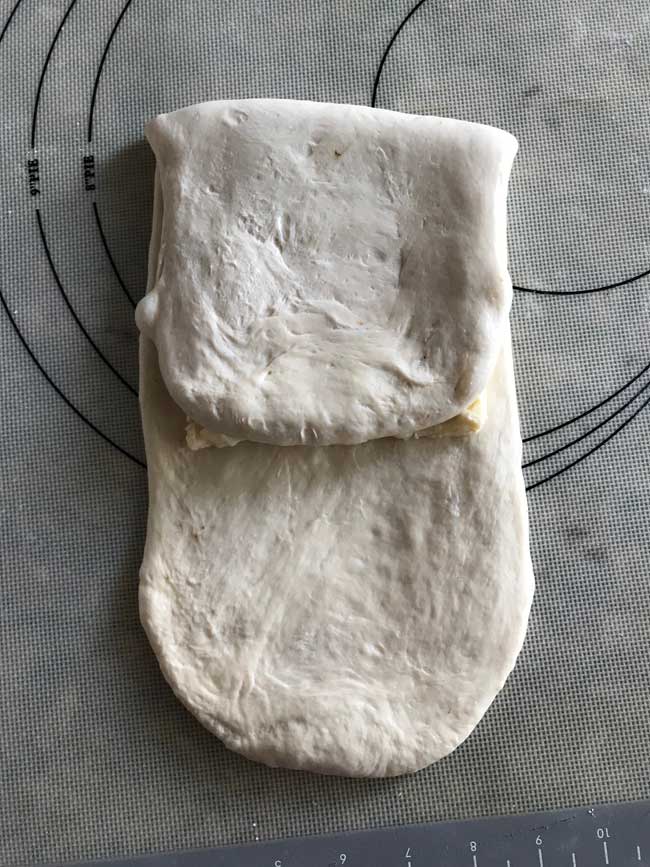

You then gently seal the butter into the dough making a square "ish" dough packet. Chill this briefly so that the butter firms up before you begin your series of "turns". A turn is when you roll out the dough and fold to make layers. For this recipe you will do three turns, chilling the dough for 20 minutes between each turn to keep the butter from soaking too much into the dough. This is where it gets time consuming, but it's passive time and you can do other things.
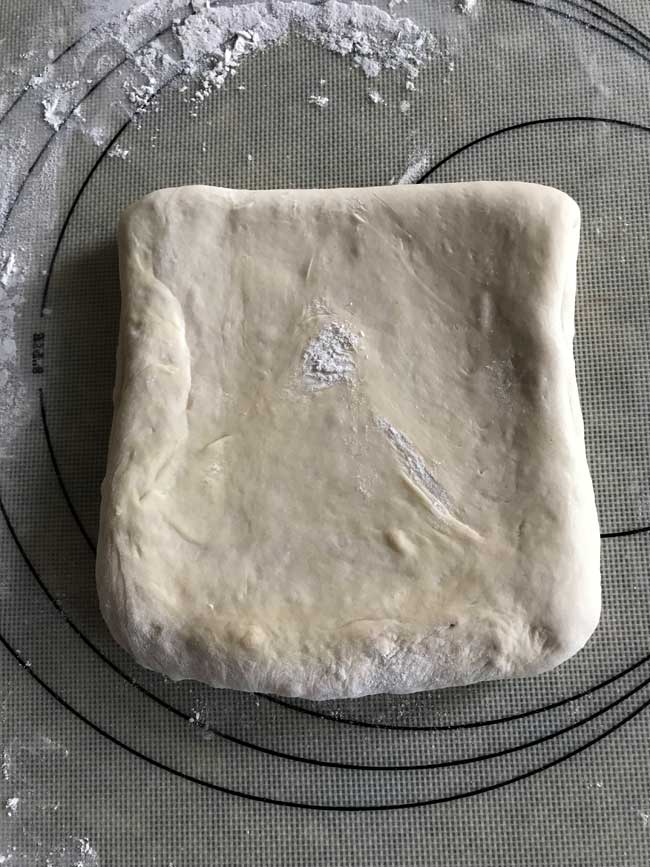
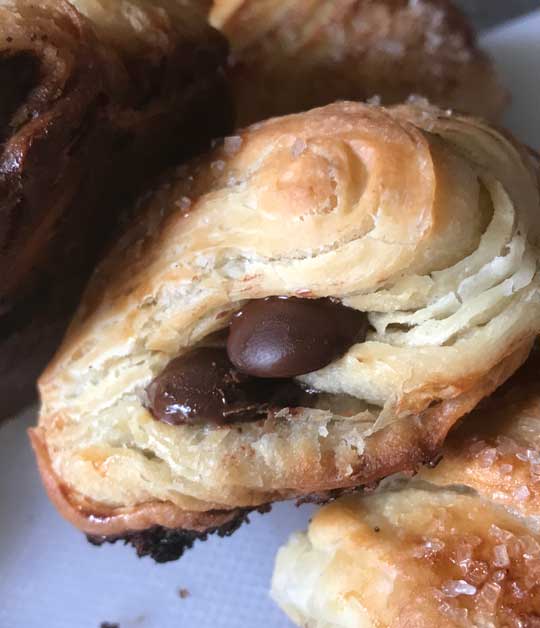
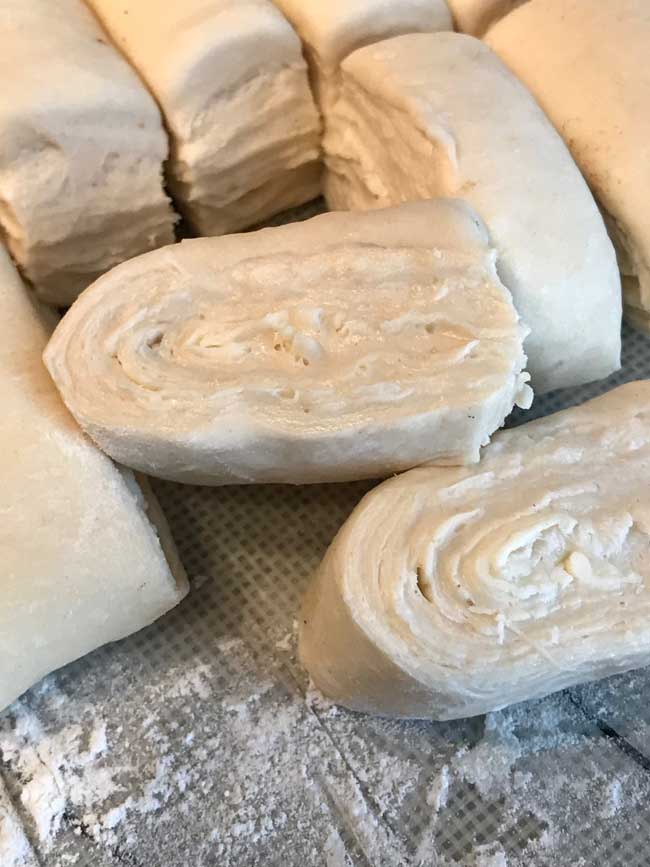
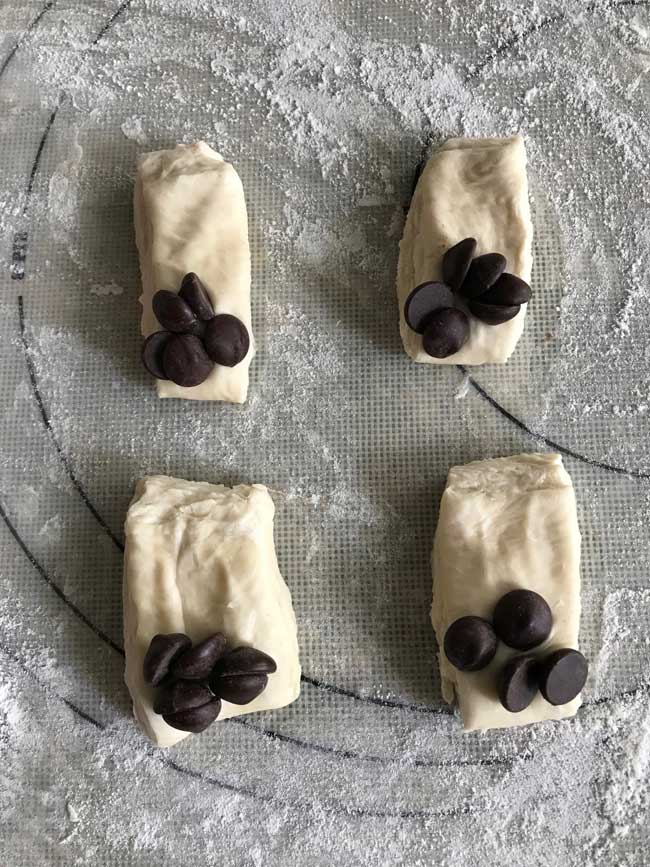
Once you've rolled and folded the dough three times, you cut it into chunks which you will roll individually with the chocolate. For this batch I made 16 chunks so the pastries are on the small side. You may want to go with 12. I like a high ratio of chocolate to pastry so I make them fairly small.
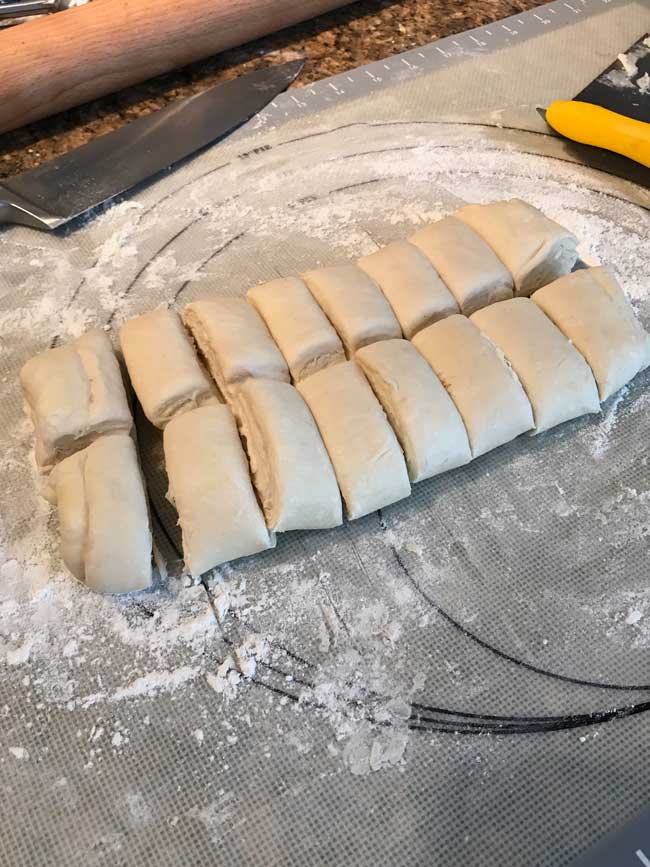
Here's the reward for all your turns. Lots of layers! When you fold each pastry, you'll want these cut sides on the sides. That is, you position each chunk so that the smooth top part is lengthwise and the chocolate goes on top of it.
Chocolate Batons and Substitutes
French Pain au Chocolate is filled with chocolate batons. Our European grocery store sells them and they are very good, but I usually fill my Pain au Chocolate with bittersweet chocolate chips or whatever chocolate I have around. Sometimes I use Dove Squares and sometimes I use hazelnut flavored dark chocolate. The dough gets pressed down slightly and rolled around the chocolate enchilada style.
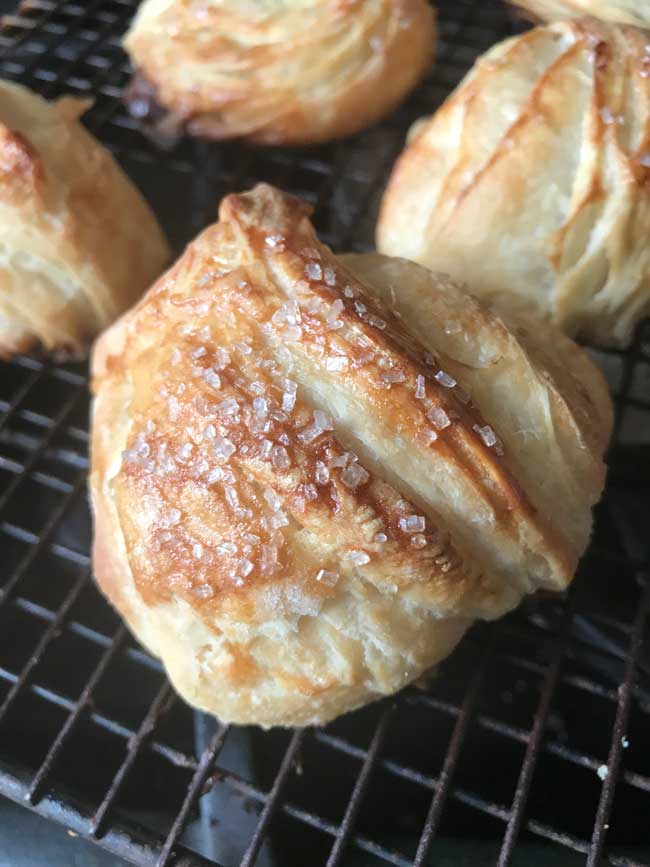
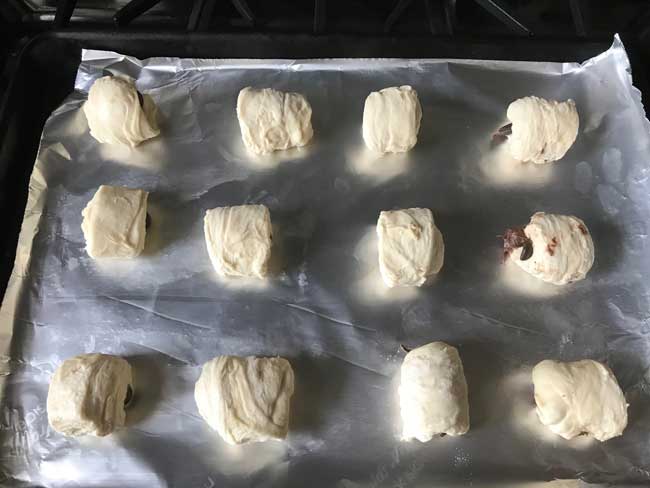
Here are 12 of them (I put the other 4 chunks in the freezer for an experiment.) The dough then sits for 40 minutes, gets brushed with egg and sprinkled with sugar, then baked.
Now back to that experiment with the four chunks of dough I set aside to freeze.
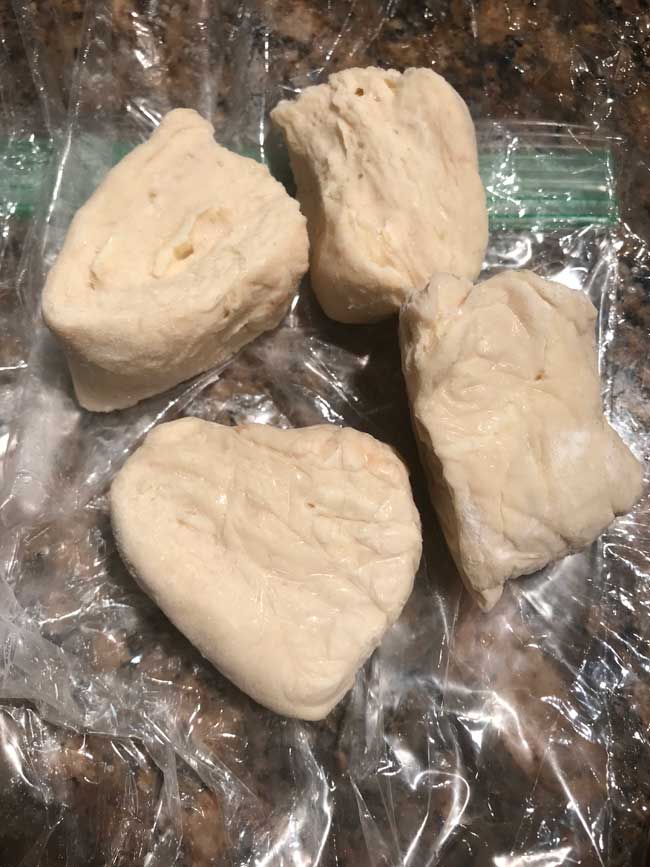
I thawed them out the next morning and rolled them with different chocolate. The frozen chunks took about an hour to thaw in the refrigerator and I was able to make fresh Pain au Chocolat that morning. Then again, I could have just made them all at once and frozen all 16 because these freeze perfectly.
Recipe

Frozen Bread Dough Pain Au Chocolat
Ingredients
- 1 pound frozen bread dough thawed
- 10 tablespoons butter, cut into 8 to 10 chunks (140 grams)
- 2 teaspoons flour (6 grams)
- 1 large egg, beated in a cup for egg wash
- Semisweet or bittersweet chocolate for filling
Instructions
No-Mess Butter Rectangle
- Put the butter chunks in a gallon size zipper freezer bag. Sprinkle butter with 2 teaspoons flour and shake bag to coat. Pound the bag of butter with a rolling pin or some other large heavy object, then use your hands to shape the butter through the bag into a 5 ½ by 11 inch rectangle. The rectangle should take up half the bag.
- Lay it flat (you can put it on a tray or plate of some kind if you'd like) and refrigerate for about 20 minutes or until it is very cold and firm.
- On a lightly floured surface, roll the dough into a long rectangle, about 5 ½ x 16 inches, with the short side closest to you. If using a pastry mat, you may want to position it lengthwise.
- Take the bag of butter from the refrigerator. Open the bag and cut away the sides of the bag (or cut one side and the bottom) and pull the bag away from the butter so that you have a big greasy plastic sheet with a rectangle of butter stuck to it Cut the butter into two square pieces. Hang onto your greasy cut bag because it will come in handy later.
- Set one of the butter sections in the center of the dough rectangle and fold the top exposed portion of the rectangle down over the butter. Set the second section of butter on top of the folded down dough. Cut off the bottom exposed part of the rectangle and set it on top so you have a sandwich of two layers of butter and three of dough. Pinch the edges of dough in to seal in the butter making sure it's fully enclosed. Put the dough in the refrigerator and chill for 20 minutes.
- First Turn: Take the dough out of the refrigerator and put it on the lightly floured work surface. Roll into a long rectangle approximately 6x16 inch making sure the butter spreads out as you roll. Fold one-third of the dough down and then fold the other third up so that you have kind of a bricklike thing. Put the dough back into the plastic bag and chill for another 20 minutes.
- Second Turn: Repeat what you did before. Take the brick thing out of the refrigerator, roll it again into a rectangular shape. Shoot for 16 inches in length (top to bottom) and a width of at least 6 inches. You may get a wider width and that's okay, but try fold top third down, fold bottom up and over and return to refrigerator for 20 minutes.
- Third Turn: Repeat the fold as you did in the first and second turns, rolling into a rectangularish thing that is about 16 inches and however wide it happens to get.
- Chill the dough for another 20 minutes or so or until you are ready to shape the Pain au Chocolat.
- When you are ready to shape the Pain au Chocolate, line a large rimmed (this is important because the dough may leak butter) baking sheet with parchment paper or nonstick foil.
- Put the dough on a lightly floured surface and pat it into as big a rectangle as you can. You can roll if you want to, but just patting should be fine. The goal is to get it into a shape that will allow you to cut 12 to 16 equal chunks.
- With a chef's knife, score into 16 equal chunks. Gather all the chunks except 4 and put them in the refrigerator while you roll the first 4.
- Working one chunk at a time, take a chunk of dough and turn it so that the exposed layers (cut sides) are on the side. Press the chunk into a rectangular shape, then lay chocolate at the bottom. Press down and wrap the dough up and around the chocolate sealing it in the best you can to make a little bundle. Set seam side down on the baking sheet. Repeat, using all the dough.
- Cover loosely with greased plastic wrap or the greasy bag you used for the butter and let rise for about 45 minutes.
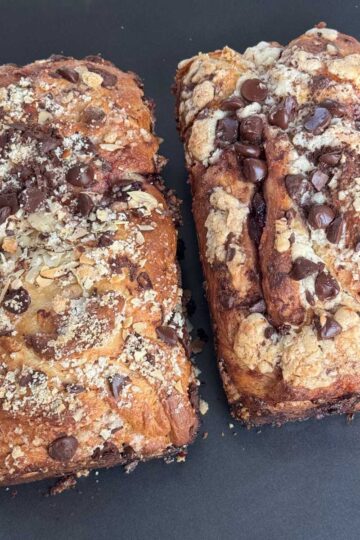
- Brush lightly with beaten egg and bake in a preheated 400 degree oven for about 20 minutes. Remove from the oven and carefully transfer the hot pastries to a wire rack. Note: There will most likely be leakage and it might look like a mess. Just get the pastries off the pan and onto a cooling rack and you'll be fine. Also, chocolate tends to leak out, especially with the smaller size pastries. To keep your pastries full of chocolate, keep some chocolate chips or chocolate chunks next to the oven. When you are removing your pastries from the baking sheet, carefully poke extra chocolate into the sides or wherever there's a nice entry point between the layers. The new chocolate will melt in with the baked chocolate as the pastries cool.
- These freeze well. After pastries have cooled, stick them in a freezer bag and store them in the freezer. Reheat in the toaster using your favorite method - 350 for about 5 minutes works for me.
Anna says
Hi Deborah,
Thanks for the tip on Rhodes! I'll stick with that brand for now. Also, thanks for subscribing to the newsletter. It's not really much of a newsletter but rather an alert letting you know when I've posted something. I don't post as much these days, but I'm trying to pick up the pace ;).
Deborah says
Anna, I love your blog. I have found that the Rhodes frozen dough is probably the best available. I love the breads with chocolate chips and chocolate fillings, so thank you for sharing this recipe. I just joined your newsletter, and hope to find more inspiration there. happy holidays, Deborah
Sue says
I forgot to say that I really like the photos too. Not only are they helpful but the finished pastry is really photogenic.
Sue says
Those are really good instructions! Someday I will have to try this.
I like your experiment too. They would be fun to pull fresh out of the oven and serve.
T. Martin says
What pastry mat is pictures?