
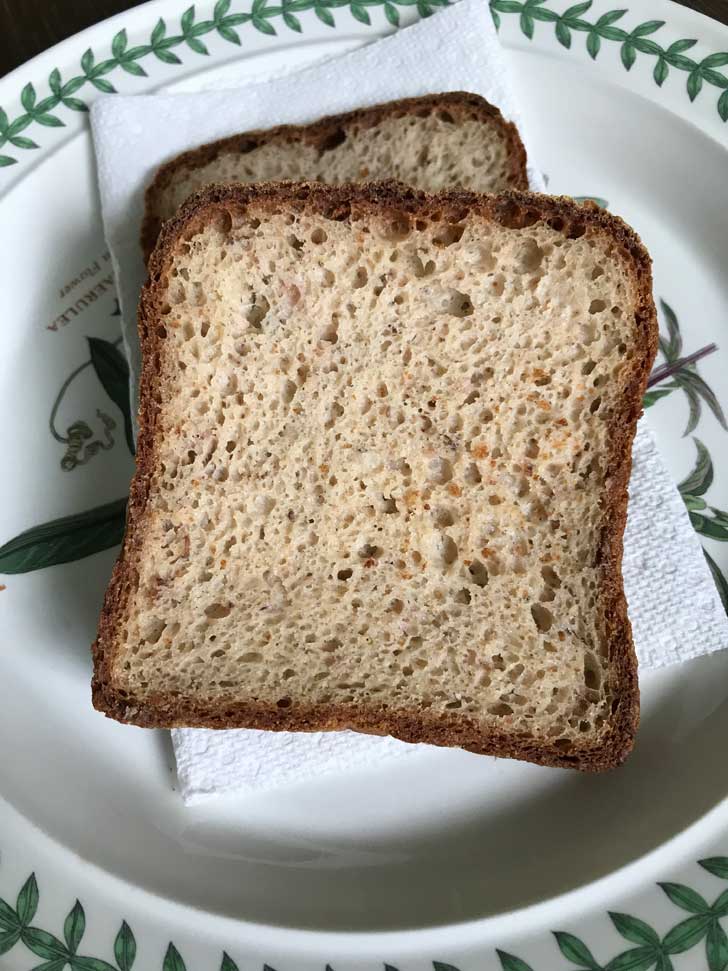
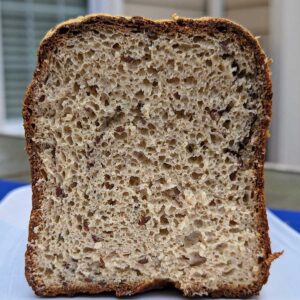
This is a gluten-free bread recipe that I make about once every 3 weeks. The prominent flavor is the sorghum, so I call it sorghum bread, but it also includes tapioca and brown rice flours. While it can be used as a sandwich bread, I think of it more as a toasting bread because it's so crusty and chewy. It's perfect as morning toast or topped with butter and served as a side bread at dinner.
No Eggs, Butter or Xanthan Gum
The recipe is a spin on one from Cannelle et Vanille Bakes Simple, an excellent book for beginner gluten-free bakers. Gluten-free breads can be very tasty, but sometimes they're rich with eggs and butter. This loaf is made without any eggs or butter and only enough oil to grease the pan. What it does have is psyllium, a healthy fiber that helps the dough behave more like traditional wheat dough in that you can actually shape it. Most gluten-free yeast bread doughs tend to be like thick batters.
Baking Time and Temperature
You may question the very long baking time at 425 degrees F. Gluten-Free Sorghum Bread bakes for an hour at 425 degrees F., then you remove it from the loaf pan and bake it out of the pan for another 30 minutes. This does two things. It helps remove some of the excess moisture from the inside of the bread and gives you a dark brown and very chewy crust. I've seen comments from people on other sides who have had to reduce the baking time or temp after the first hour, but I've never had to do that.
Loaf Pan Size
If you are just getting into gluten-free baking or any kind of yeast bread baking, a Pullman pan is a great investment. The high sides of a typical 1 pound Pullman help support the dough as it rises, making for tall and stately loaves. Gluten-free breads like this one need all the help they can get.
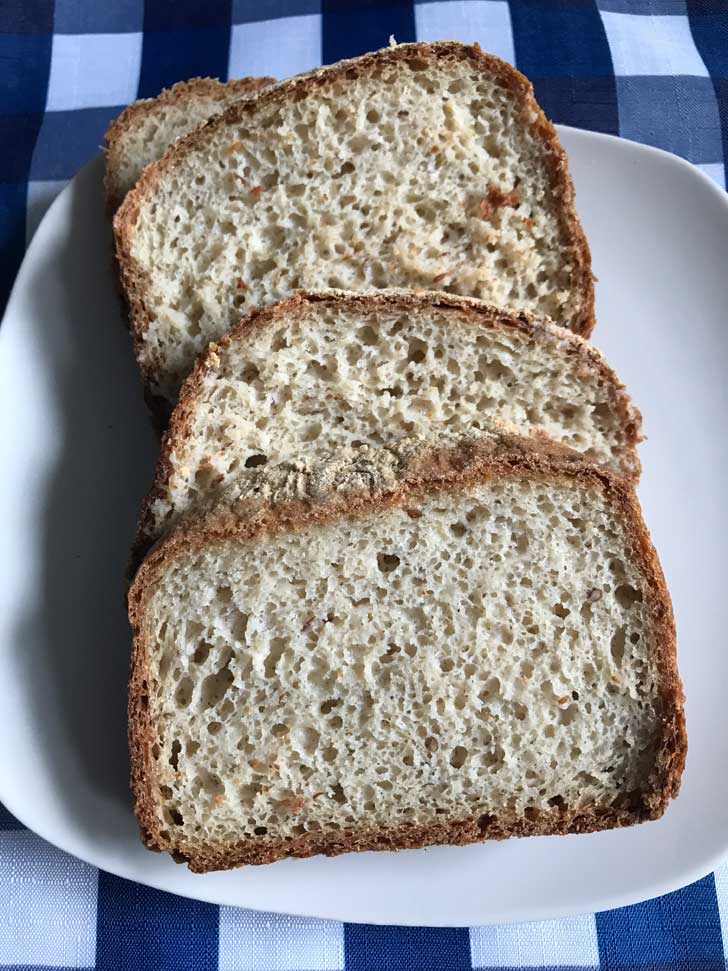
Here's a picture of a loaf I baked in a standard 8 ½ x 4 ½ inch loaf pan, but I did reduce the batter by ⅓ so of course it's shorter. In this case, I just wanted smaller slices.
Measurements for Smaller Loaf
If you don't have a tall Pullman and want to make a smaller loaf in an 8 ½ by 4 ½ inch pan, here are the measurements:
- 95 grams sorghum flour
- 140 grams superfine brown rice flour
- 80 grams tapioca starch
- 1 ½ tsp. salt (scant teaspoons)
- 2 teaspoons flaxseed meal
- 2 teaspoons sugar
Wet Mixture
- 410 grams water
- 1 teaspoon honey or maple syrup
- 2 teaspoons active dry yeast
- 15-16 grams whole psyllium husk
- 2 teaspoons apple cider vinegar
Sorghum Bread Variations
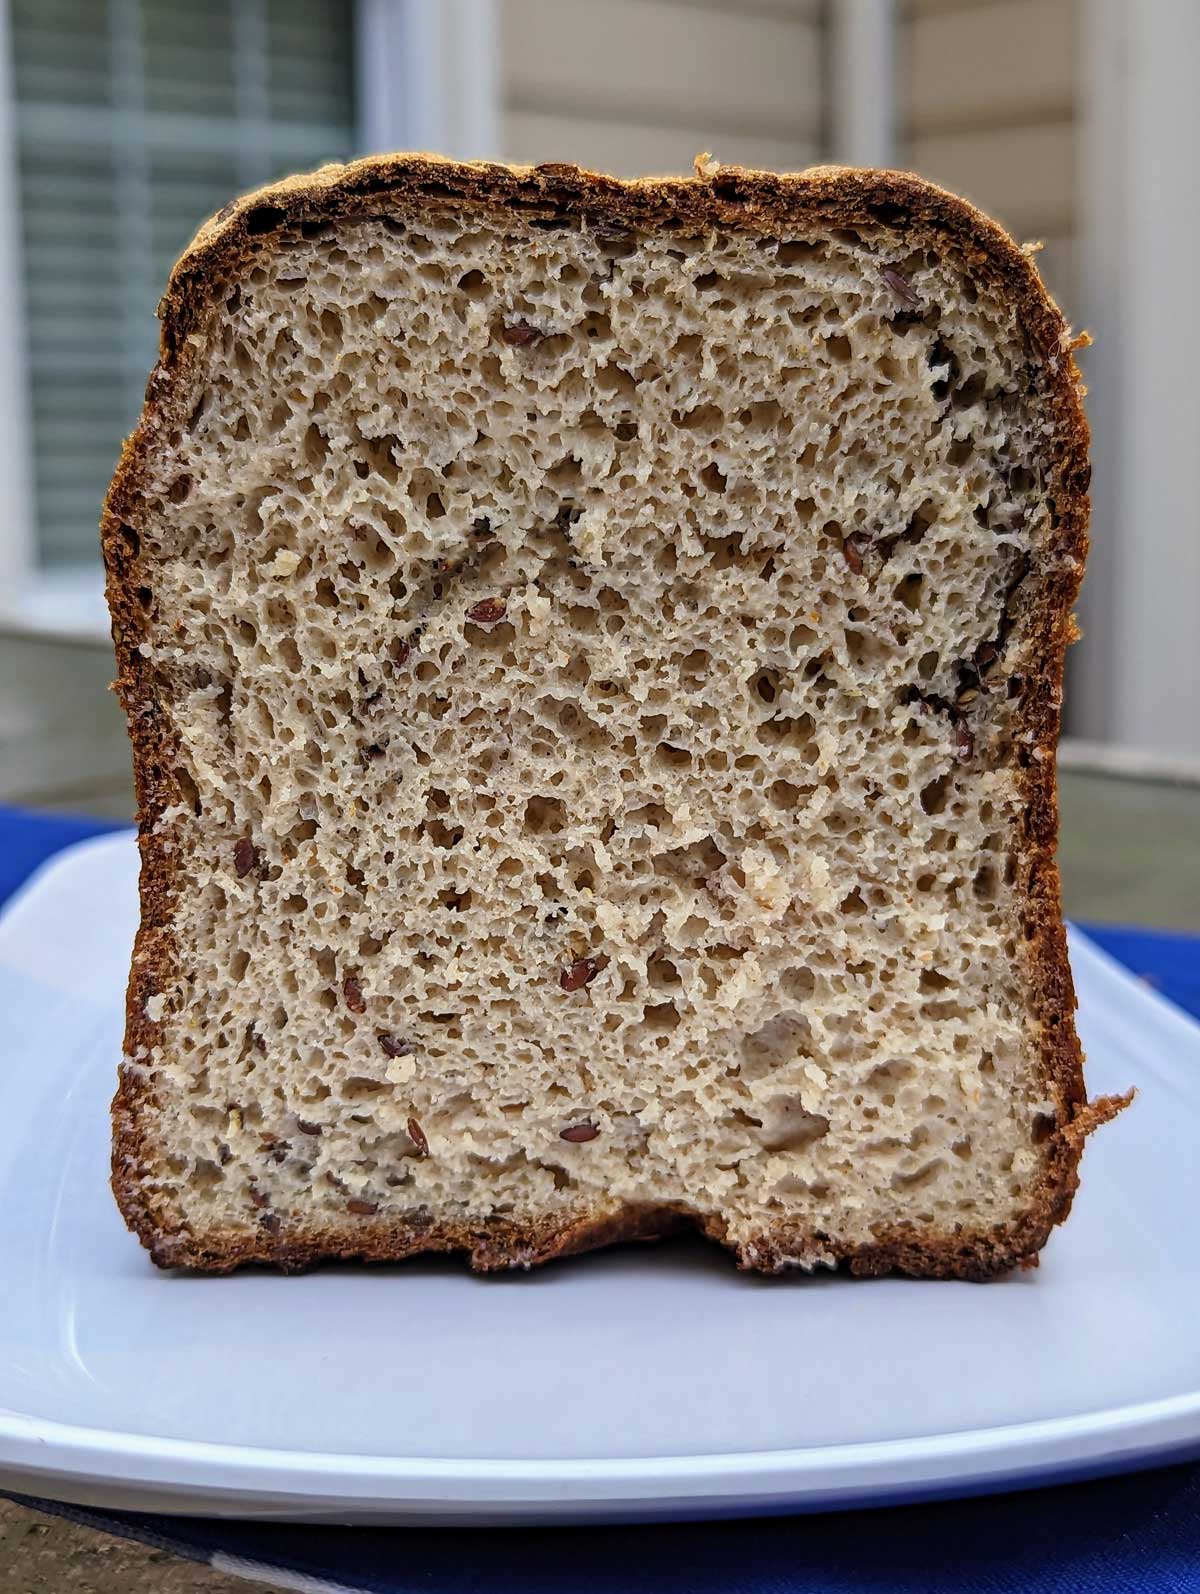
My favorite variation of this bread recipe is Sorghum Flaxseed Bread. It's easy. Before starting, soak 2 tablespoons of whole flaxseed in 2 tablespoons of very warm water. The flax should completely absorb the water. Add the plumped up flax to the bread right after you finish kneading with the dough hook. You can work it in a little more after you empty the dough onto the mat. Other variations include adding the plumped flaxseeds as mentioned above, using half quinoa flour in place of half the sorghum and adding a big handful of shredded, well-drained and dried carrots for Flax Quinoa Carrot Bread. There are lots of options! I recommend trying the recipe as written first, and feel free to leave a comment if you have a question.
Calories in Gluten-Free Sorghum Bread
As requested, I tried to estimate the calories per serving using a calorie counting app. This bread comes in around 52 calories per oz, which I figured out by adding up the ingredient calories (did not use milk powder) and dividing by the weight in ounces of the whole loaf. My last loaf weighed 35 oz so 1/16 would be a little over 2 oz. That would be a very generous slice or 2 thin ones and 113 calories. There's also only 1 gram of fat per slice.
Recipe
Gluten-Free Chewy Crusty Sorghum Bread
Ingredients
Dry Mixture
- 140 grams sorghum flour (about 1cup)
- 210 grams superfine brown rice flour (about 1 ½ cup)***
- 120 grams tapioca starch (about 1 cup)
- 2 tablespoons dry milk powder (optional)
- 2 tsp. salt (scant teaspoons)
- 1 tablespoon flaxseed meal (7 grams)
- 1 tablespoon sugar
Wet Mixture
- 620 grams water (this is about 2 ⅔ cup) or 22 oz I weigh the water
- ½ tablespoon honey or maple syrup (10 grams)
- 1 tablespoon active dry yeast
- 25 grams whole psyllium husks or 25 grams of psyllium powder (link is to the powder, but you can use equal amount of whole husks)**
- 1 tablespoon apple cider vinegar
Instructions
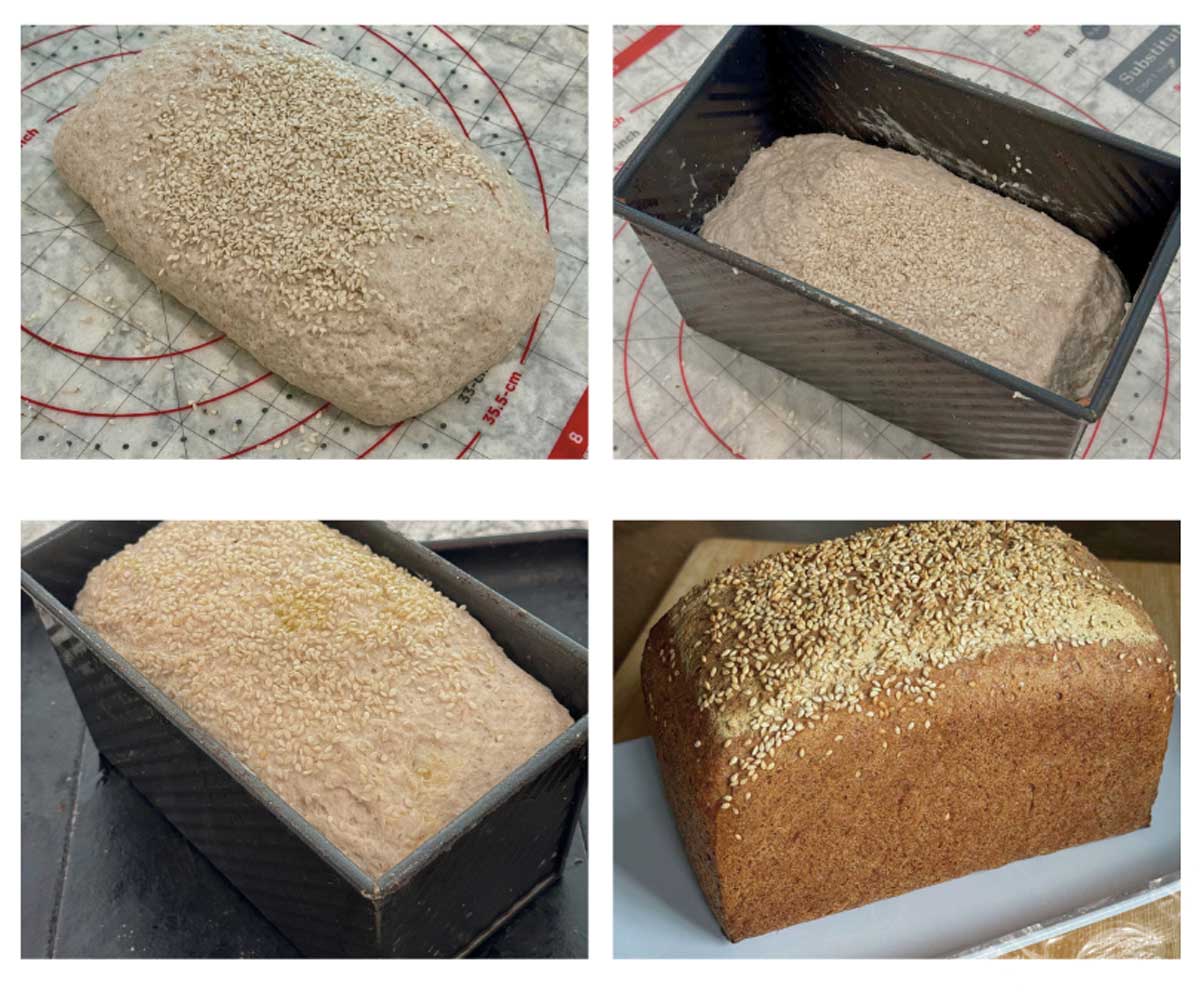
- Grease a 1 pound Pullman loaf pan or an 8 ½ by 4 ½ inch loaf pan. The narrow bottom and tall sides of a Pullman give the dough more than enough room to rise. You will not need to use the top of the Pullman.
- In large bowl, whisk together dry ingredients using the weights given.
- Heat the water in the microwave to about 110 degrees and pour it into the bowl of a stand mixer. Add the honey. Let cool to about 105 degrees. Stir in the yeast and let stand until it becomes slightly foamy. Add the psyllium and stir to make a gel. Add the vinegar.
- Add the flour mixture to the psyllium/yeast mixture and stir just until mixed.
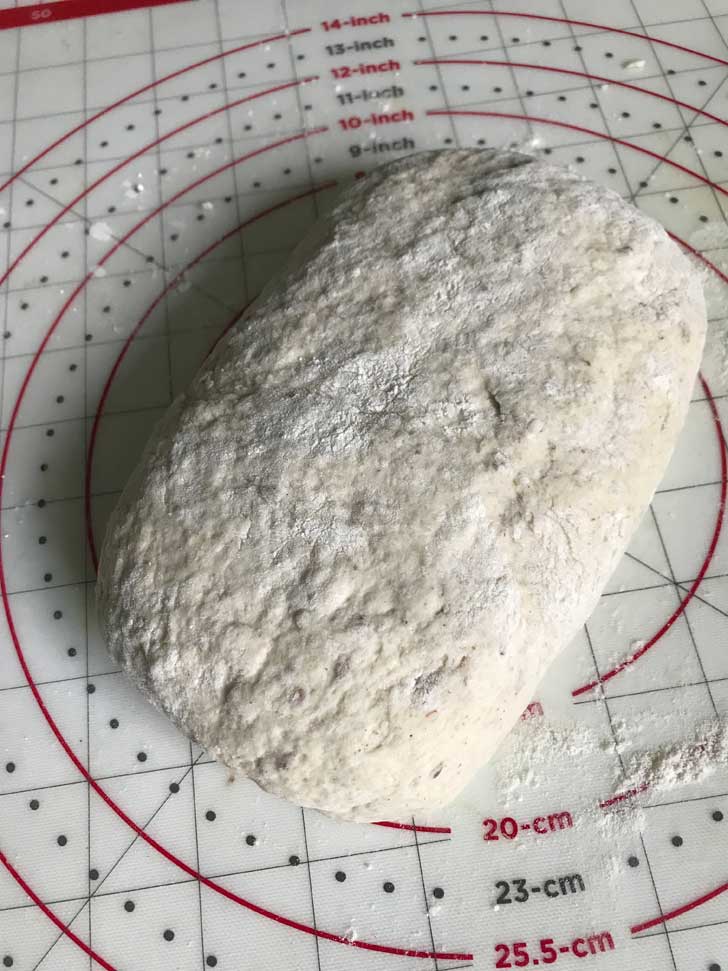
- Use the dough hook to mix the ingredients for about 2 minutes, stopping often to scrape sides. The dough should form a sticky mass at this point. Turn it out onto a pastry mat dusted with rice flour and coat lightly with flour. Shape it into a nice loaf and put it in your pan.
- Cover with greased plastic wrap and set in a warm place to double in bulk. This should take about 35-45 minutes.
- Towards the end of the rising period, preheat your oven to 425°.
- When dough is done rising, bake on center rack for one hour at 425°. After 1 hour, carefully remove the loaf. Set it on a sheet pan (or you can put it directly on the rack) and bake for another 30 minutes at 425°. This is the correct time and temp. If you feel like this is too high for your oven, you can reduce heat to 375 for the last half hour. However, the long bake time is important because it removes moisture from the loaf. It also makes the crust very chewy.
- Let cool completely on wire rack before cutting. This will usually be at least 3 hours.
- When slicing bread, be sure to use a serrated knife to gently saw back and forth. I sometimes chill the bread slightly so that it will be firmer and easier to cut. It's usually quite moist the first day, but tends to lose some of the moisture as it sits. I still think it's best toasted.
Anna says
Alison, I'm glad you are continuing to experiment with it. Gummy loaves are part of the learning process for all of these gluten free yeast breads. Increasing the baking time should help. The brand of rice flour can really affect the outcome too so be sure to use one that's very absorbent. Also, you could try making it with psyllium powder rather than the whole husks. I actually alternate between both now -- either 25 grams of whole husks or 25 grams of psyllium powder. That might give you a dryer interior.
Alison says
Hi Anna, thanks so much for your suggestions. I basically followed your first suggestion today and, alas, it came out gummy. I am toasting slices and it's delicious, in any case. But! I will try following your second suggestion and see if that helps. And maybe cooking it a bit longer than 45 minutes out of the pan? Or, baking it at 425 for half an hour and then reducing it to 400 for another half hour? I'll keep trying. It's delicious and worth the effort.
Anna says
Hi Alison,
I've always used 425, but since you can't go that high with the pan try 400 for the first hour then out of the pan at 400 for 45 minutes. So basically just extend the time a little. The long bake time removes moisture to keep the interior from being gummy, so if that ends up not being enough time you can at least toast the slices. But it will probably be okay. Let me know!
Another thought. Since you CAN bake it above 400 for less than 30 minutes, maybe preheat to 425 and get the oven good and hot. Put the bread in at 425, but then reduce to 400 and let it go for an hour before taking it out of the pan and baking for another 45 minutes. That will at least give you a good blast of heat at the beginning.
Alison says
I have a nonstick Pullman whose manufacturer specifies it should not be baked at temperatures above 400 degrees for more than 30 minutes, and I'm going to take their word for it. How can I change the oven temperatures and baking duration to accommodate this?
Anna says
Mab, thanks for trying it! Next time I make it I'll put the ingredients in an online calorie counter, weigh the loaf and divide it by however many ounces. My guess is it has something like 65 to 70 calories per oz because it does have a lot of water and fiber. But I'll make another batch and let you know.
If you get a chance, do try the variation with the whole soaked flax seeds, quinoa flour and carrots or even just the flax and carrot if you don't have the quinoa flour. It really makes it special.
Also, I'll bet if you buy a Pullman you will not regret it :).
Mab says
I love this bread! I don't have a Pullman pan, so it overflows, but it tastes and acts great! Any idea of the nutrition profile of this bread?