
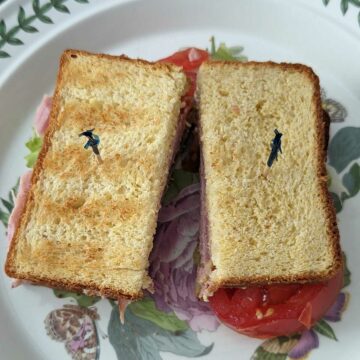
Dr. Michael's Yeasted Cornbread is sandwich bread with a hint of cornmeal flavor. It's an old recipe I found on Allrecipes.com years ago, and I have a vague recollection of making it and liking it. For a while, it got lost in the shuffle. That is, made it once, liked it, then forgot all about it because I have so many bread recipes. Then one day I made it again and realized it was really great for ham sandwiches. Then I made it again, and again and just recently, in a Pullman Pan. So it's safe to say this is a tried and true recipe at our house (and at Dr. Michael's).
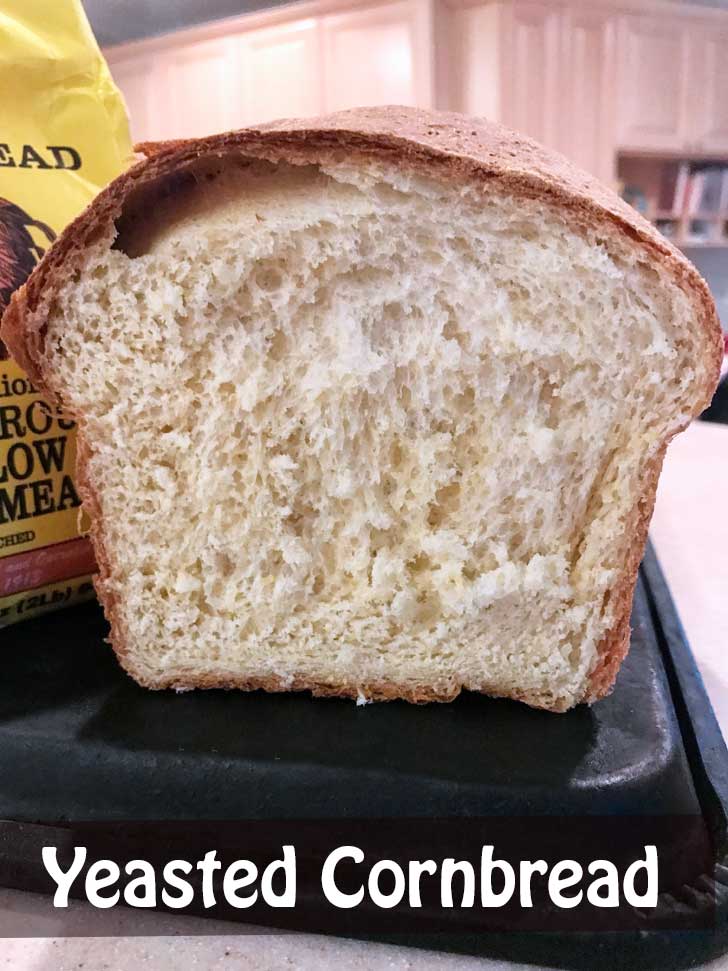
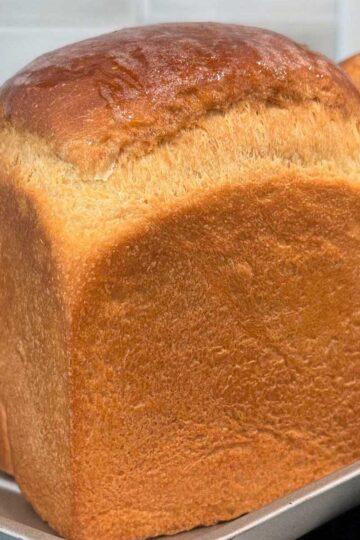
Here's a picture of it from the time I used my cast iron loaf pan. I thought it would be fun to keep the cornbread in a cast iron skillet theme going even though these two breads are completely different types of cornbread. Dr. Michael's Yeasted Corn Bread is not to be confused with the Southern style quickbread we know and love.
What's Yeasted Cornbread?
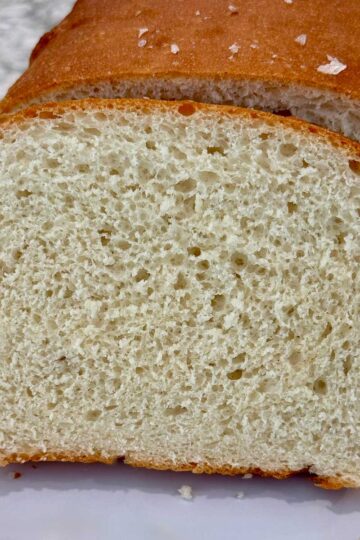
So yeasted cornbread is nothing like regular cornbread. It is a fluffy (sort of, it's not coarse) white sandwich bread with flecks for cornmeal and cornmeal flavor. The original recipe was designed for a bread machine, but I made (and will keep making) the bread the usual way, which is in with stand mixer and dough hook. Also, since I used the stand mixer, I changed the technique and ended up using about ½ cup less flour than the original recipe.
Brand of Cornmeal and a Few Ingredient Notes
Since posting this I've used different types of cornmean including Head Stone Ground Coarse Cornmeal. It's a little coarser than some other brands, but can be used interchangeably with finer cornmeal like Quaker or Martha White, which I've also used. For the flour, I use bread flour (though AP flour would probably be okay). And for the fat, I've tested with shortening, oil and butter. My new favorite is the butter version.
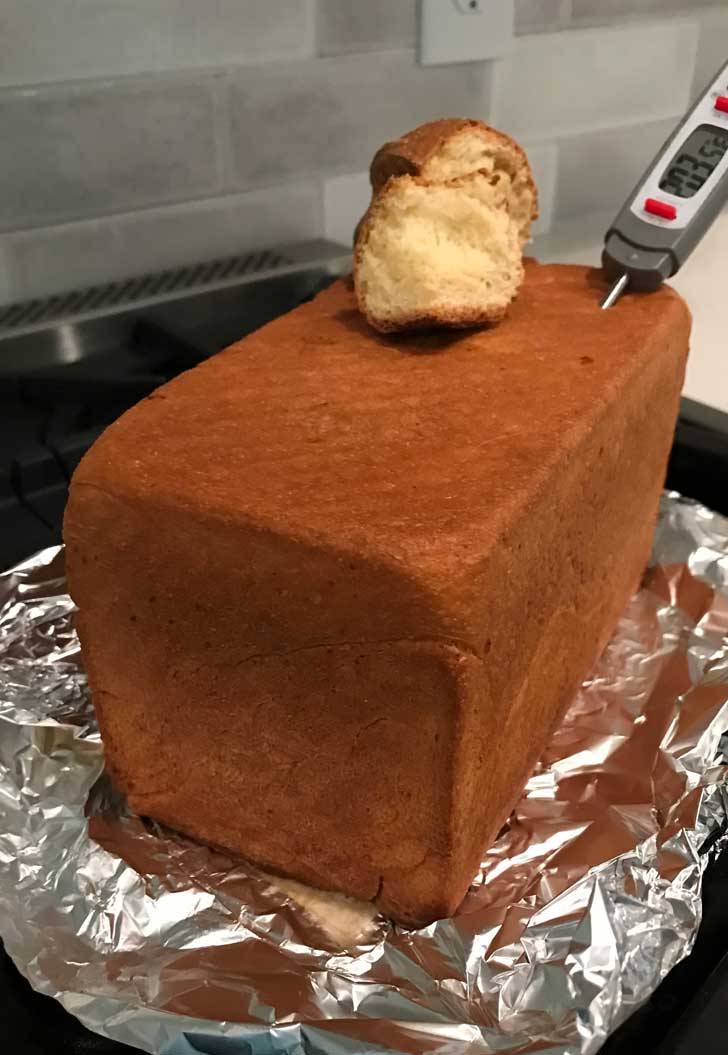
Pullman Version
If you have one, you can make this bread in a Pullman pan. Mine is a 1 pound Pullman, and this loaf almost fits it just right. I put aside 100 grams of dough and bake it as a little roll alongside the bread. The Pullman loaf took about 38 minutes to bake.
One Last Tip
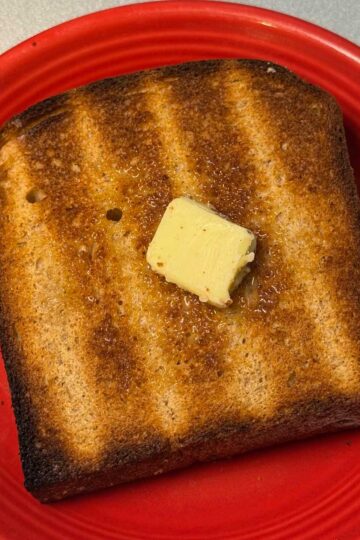
If you make a lot of sandwich bread you probably know this, but one thing I've learned is it's so much easier to slice after a few hours in the refrigerator. Too much time in the refrigerator can dry out a loaf, but letting the loaf cool at room temperature and then giving it a quick chill will firm it up and make it easier to slice for sandwiches.
More Recipes
Recipe
Dr. Michael's Yeasted Cornbread
Ingredients
- 1 cup milk (230 grams)
- 2 ¼ teaspoons quick rising yeast
- 3 cups bread flour (390 grams) plus ½ cup (65) if needed (390 grams)
- ½ cup cornmeal (60 grams)
- 1 ¼ teaspoons salt
- 3 tablespoons granulated sugar (40 grams), I rounded up a little
- 3 tablespoons shortening or oil OR 2 tablespoons butter (36 grams) shortening or (28 grams) butter
- 1 large egg, room temperature
- 2 tablespoons water (I didn't use)
Instructions
- Heat milk to about 110-115 degrees and pour it into the bowl of a stand mixer. Add the yeast and stir to dissolve. Allow it to sit until it bubbles (proof) then add 3 cups of flour (390 grams) along with all remaining ingredients. Set the remaining ½ cup of flour aside.
- Stir by hand or using the paddle attachment until you have a thick dough.
- Attach dough hook to bread machine, set the bowl on the stand and knead the dough for about 8 minutes or until smooth and elastic. It should clear the sides of the bowl as it is kneaded and not stick to the sides. If it is sticking to the sides, add flour from the reserved ½ cup 1 tablespoon at a time.
- Transfer dough to an oily bowl and coat until it is slick. Cover bowl and let dough rise in a warm place for an hour or until doubled.
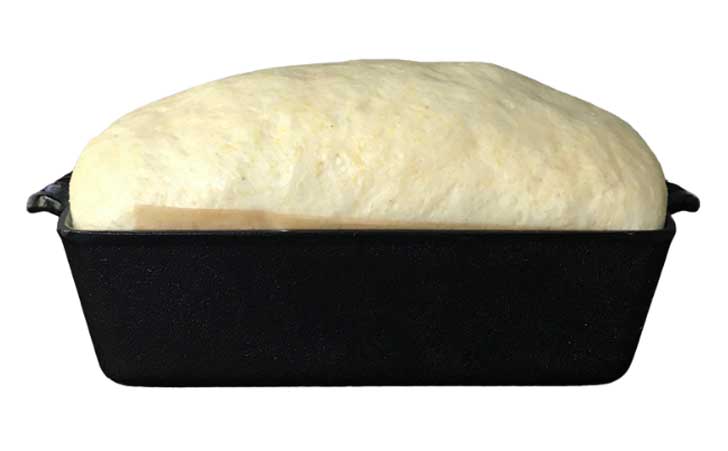
- Punch down dough. Roll into a cylinder and fit into a well greased or buttered 9x5 inch loaf pan. Let rise again for about 30 minutess.
- Preheat oven to 375 degrees F. Bake for 30 to 38 minutes or until golden and loaf sounds hollow (internal temperature should be around 203F). Let cool completely before slicing.
Anna says
Thanks Sonya! I have another bread recipe to try today from one of my favorite chefs, Alex Guarnaschelli, so I'm glad you are enjoying the bread recipes.
Sonya says
Thank you for the tip about slicing bread! I didn't know that and am so grateful to hear it! So hard to slice some homemade breads neatly, lol!
And your recipe looks delicious as always! Happy baking!
cookiemonster says
Thanks...looked like some fancy pan. You are definitely clever...my need to throw things out....prevents me from being clever...OCD!!!
cookiemonster says
No...look at your link to it...it is a black pan on it's own stand or something? It looks soooo interesting...
Anna says
You know what that is? That is one of the grates from my gas range. I am too cheap to buy a real cooling rack, so I just remove the grates from my range and stand whatever on top so the air will circulate underneath. So that picture is of the springform pan sitting on the grate.
Anna says
Er, yeah. That cake. Sorry.It's an 8 inch round springform pan.
cookiemonster says
No, the pan the cake is in!!Thanks,
cookiemonster says
WHAT KIND OF PAN IS THAT IN THE CAKE PICTURES????Thanks!!!
Anna says
YOU MEAN THE BREADMAKER? THAT'S THE BREADMAKER PAN.
Joe says
Would putting the dough in the fridge for an hour or so help at all with the spreading? I've noticed when I do that with all butter doughs they tend not to go all over.The cake looks good so far! Can't wait to see the finished product!
Anna says
Joe, I chilled the dough for about an hour. Maybe if I'd chilled it a little longer that would have helped.
Molli says
Thanks for trying out the cookies. Glad to hear it wasn't my mistake. I've never waited a few hours to try them, and don't think it would when making a small batch. I can't wait to see your improved recipe. I like CCC like you do 🙂